Showing posts with label beef. Show all posts

Friday, September 26, 2014

brussels sprout curry, aka: colon-blow curry

Truth time. I had a pumpkin smoothie for breakfast, rather a large amount of broccoli at lunch, and then washed this curry down with a glass and a half of porter. I predict things are going to start getting musical (and fragrant) around here in about, hmmm...let's say four hours or so. The effect will of course be doubled because the Ginger Beast had the same dinner as me (and is generally far more prone to flatulence in general). So basically what I'm saying is, you're probably not going to want to visit any time in the next 8-12 hours. You have been warned.

ANYWAYYYY.

This curry was very much an on-the-fly thing. We had company coming for dinner and all I had for protein was a package of defrosted meatloaf mix (ground beef, pork and veal combination). Trying to come up with what to do with that, a box of shredded Brussels sprouts and a can of fire-roasted tomatoes (I love you, Muir Glen!)  made for an entertaining ride home, but then it occurred to me that curry could in fact be the answer to my problems. Well, some of them...possibly the root of others, but we'll cross that bridge when we come to it.

Mmm. Fiber.
Basically, this is just a standard mince curry with a few cups of shredded Brussels sprouts added when I added the tomatoes. I also used a can of coconut milk, but I only used the solidified cream from the top of the can, not the watery part. And yes, that's a little bit of rice at the bottom of the bowl there. This is the first rice I've had in...I can't even remember how long. Many months. It was just there for filler because I was feeding a non-Paleo-eating person who is accustomed to a starch with dinner. My portion size was about 1/4 cup of the rice with about a cup and a half of the curry over top.

Minus the rice, this is Paleo compliant. The glass and a half of porter I drank with it , of course, are not. Is not? NOT. Beer am good. I wonder if there's any left...

Tuesday, April 1, 2014

beef short ribs

Beef short ribs are something I've always wanted to try cooking but either couldn't find them, couldn't AFFORD them, or was intimidated by them. The stars aligned today, though - short ribs were in stock, they were on sale, and I wasn't afraid to throw them in the crock pot and see what happened!

What happened was this, and it was so, SO good:

mmm, beef!

The fact that I was ever intimidated by short ribs is really kind of laughable, given how dead easy these were to make and how well they turned out. I guess I was thinking they'd be sinewy and tough, but they turned out fall-apart tender and full of amazing beefy goodness.


I started by seasoning the ribs with salt and pepper and searing them off in a hot pan. The ribs then went into the crock pot with a large onion, a couple carrots, a couple stalks of celery, and five or six cloves of garlic, all chopped roughly. I added a bay leaf, a little allspice (like half a teaspoon), and about a quarter cup of dried porcini mushrooms that I crumbled. I deglazed the searing pan with some beef stock, then dumped that into the crock pot along with a couple more cups of beef stock. I probably ended up using about 3 cups of stock plus a cup or so of water. It all cooked on low for about six hours, then sat on "warm" until I got home a couple hours after that.


When I got home, I steamed some green beans, fished the ribs out, and took a stick blender to the liquid and softened veg left in the crock to make a velvety sauce to spoon over the ribs. Super quick, really easy, and OMG YUMMY.


Also, a side-note - you may notice the bottles of Shed Mountain Ale in the background. If you're somewhere where it's available and you like brown ale, you should definitely try it. It went with my short ribs wonderfully and I can definitely see it being a compliment to any kind of roasted or grilled beef or pork. It's kind of heavy-duty with an ABV of 7.4%, but it doesn't taste "boozy" like some higher-alcohol beers tend to. I don't usually write about beer here, but I enjoyed the Mountain Ale enough that I'm giving it a shout out...so that should tell you something.

Friday, January 10, 2014

pumpkin chili

We started a Whole30 on January 8th at Casa De Ealachan - our first ever, in fact! We have been eating mostly Primal (basically, Paleo with dairy) for a few years now...minus vacations and a few, errrm...extended trips off the wagon, shall we say. The holidays this year were one such extended trip off the wagon for us. We pretty much went back to the Standard American Diet from Thanksgiving right through Christmas. My birthday is right after New Years, so I wanted to give us some leeway in terms of being able to celebrate that as well (read: I wanted my damned birthday cake!). Therefore, we decided that January 8th would be a better time to start our Whole30 expedition, and so far it's been good.

While planning menus and grocery lists ahead for my first week of W30-compliant cooking, I looked through a boatload of recipes to get some inspiration. One recipe I found that looked really interesting was one for chili with pumpkin in it, done in the crock pot. I'm all about tossing stuff in the crock pot to cook while we're at work, and I had a can of pumpkin left over from the holidays to use up, so I figured I'd give it a try. The only reservation I had was that the recipe called for the ground beef to be added to the crock pot raw...meaning you can't drain out the fat that renders from it. That seemed like an invitation to an epic grease-fest to me, and I ended up deciding to do the chili on the stove top rather than in the crock pot. I also used the leanest ground beef I could find (which at the time was 90/10), and in the end I didn't have to actually drain it anyway...huzzah!

Here are my recipe and notes. You'll notice the distinct lack of picture, and I apologize for that. We were so hungry and the chili smelled so good that the camera didn't even enter my mind at the time. Plus, chili doesn't exactly have a ton of visual appeal...so there's that.

This recipe is Whole30 compliant the way that I made it. Do your own due diligence - check labels for added sugar, MSG, sulfites and other nasties.

Pumpkin Chili
makes 6-8 servings
2lbs ground meat - I used 90/10 ground beef
2 x 14.5 oz cans fire-roasted tomatoes with juices
2 x 14.5oz cans plain organic pumpkin (don't get pie filling! Bad!)
1 large onion, chopped
4-6 cloves garlic (or to taste), chopped
1 sm. can roasted green chiles
1/2 cup water, stock (or beer, if you're not worried about W30 compliance)
1/4 to 1/2 cup strong coffee (optional, and to taste - I actually used about a tsp of instant decaff coffee granules because it's what I had on hand and it worked just fine)
1 tbsp bacon fat (you can use another fat but bacon fat will lend a bit of smoky flavor)
Spice blend (all subject to taste - measurements are approximate anyway):
1 rounded tbsp chili powder
1 rounded tbsp ground cumin
1 rounded tbsp cocoa
1 tsp garlic powder
1 tsp onion powder
1 tsp salt
1/2 tsp ground coriander seed
1/2 tsp oregano

Note: I used a very lean ground beef so I didn't bother draining any fat that rendered. If you are using something with higher fat content, you may want to brown the meat separately, drain the fat, then add it to the pot before you proceed with the recipe. Also, the reason I cook the onions and spices in the fat first rather than just adding the spices to the meat is because the heat and fat help the spices to bloom and cook out a little bit - it just gives better depth of flavor more quickly. If you're planning to simmer your chili for hours (or if you can't be arsed to follow directions, slacker!), feel free to just chuck everything in the pot together.


1. In a large pot over medium heat, sautee chopped onion and garlic in bacon fat until somewhat softened, about 3 minutes.
2. Add spice mixture to pot, stir well, let cook until fragrant, 1 minute or so.
3. Add ground beef to pot, stir well to combine, and cook (stirring frequently) until beef is browned. It doesn't have to be cooked completely through at this point because the chili is going to simmer for a while anyway. You want to brown the beef without burning the onions / garlic, so don't leave this unattended for too long.
4. Add rest of ingredients - chiles, liquid, tomatoes, and pumpkin. Mix well to combine. Bring to a boil, then reduce heat to low, cover, and simmer for 30 minutes to 1 hour (or more, depending on how much time you have).
5. Top with your favorite chili fixings and serve. We like chopped avocado, and if you're not worried about dairy then a little shredded jack or cheddar cheese would make this super fine indeed!

Wednesday, October 16, 2013

curry burgers

I love burgers. Burgers with bacon and avocado, burgers with blue cheese and mushrooms, teriyaki burgers, pot-sticker burgers, taco burgers...you name it, I will happily try to burger-ize it. So when I was making my shopping list this week and the idea of curry burgers struck me, it was on like Donkey Kong!

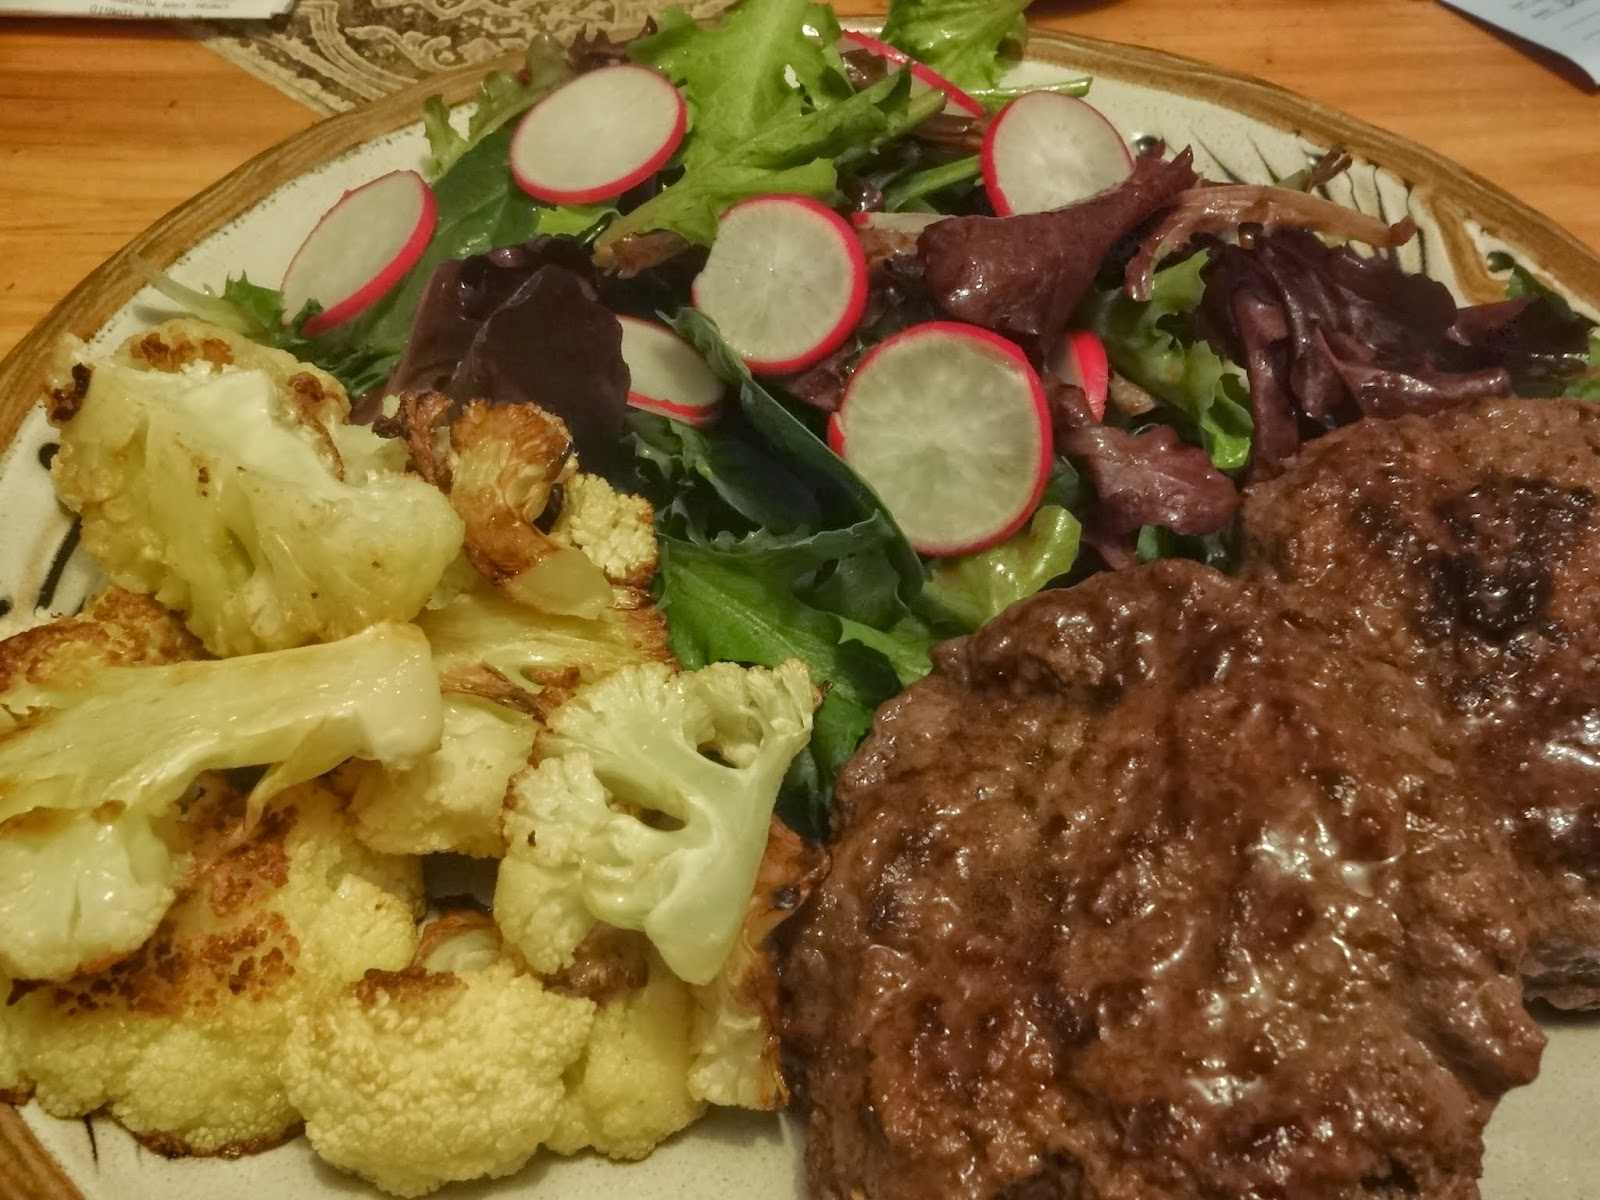
For these prototype curry burgers, I just added a tablespoon of garam masala, half a grated onion, some garlic powder and some salt to a pound of ground beef. I mixed it well with my hands and formed it into patties, then cooked them off in a hot pan. I served them with roasted cauliflower and a salad, thus:

I love radishes, by the way.

While the method of "grate onion, mix with meat and spices" produced a burger that was perfectly enjoyable, it wasn't quite as curry-tastic as I was looking for. Part of making a great curry is getting good color on your onions, because it gives a really nice depth of flavor. Another part of great curry is letting the spices toast in the fat with the onions briefly before adding the meat and coconut milk - that releases the essential oils and really opens up the spice flavors. The way I made these burgers threw both those elements out the window, and the dish suffered for it. Next time, I'm going to take the little extra time to brown the onion and toast the spices, THEN add them to the burger meat. I'll let you know how it turns out.

Sunday, October 6, 2013

sunday roast: beef chuck NOT used as pot roast?!

I don't really like pot roast. There, I said it. I think pot roast is boring. I mean, it's ok once in a while, but pot roast is just not one of those things that I get a hankering for on the regular. Thus, when chuck roast inevitably go on sale at the grocery store about once a month, I spend a bunch of time trying to figure out what kind of non-pot-roast things I can do with it. Beef stew is an obvious choice, I've got a very good Texas-style chili recipe that uses chunks of chuck, and I've had great success with making beef enchiladas out of chuck.

Those three recipes all have one thing in common with pot roast: they cut the meat into chunks and braise it in liquid for ages. The General Internets would have you believe that braising is the ONLY good way to cook chuck, that if you try to roast it you'll just end up with a chunk of terrible grey shoe leather.

I am here to tell you that, in regards to chuck, the General Internets is wrong. You can dry-roast a piece of chuck in the oven and end up with delicious, rare slices of meaty awesomeness like this:

Gravy makes everything better.
There are a couple of tricks to this, though. First, you need to cook the beef "slow and low" - that's at a low temperature for a long time. The roast I did was about 3 lbs - I started it in a 450 degree oven for 10 minutes, then turned the temperature all the way down to 200 to cook for the next two hours. You could even turn the oven lower and let it cook longer, but my oven only goes down to 200 so I had to make due.

Second, flipping the roast halfway through will help make sure it gets cooked evenly. See how the bottom edge of my slices are just starting to turn a little grey? That's because I didn't flip the meat over after the initial 450 degree blast. That side of the roast got more heat for longer and started to over-cook a little bit. Probably if I hadn't been so lazy and I had seared the roast off in a frying pan first, I could have just put it directly into the low-temp oven and avoided the problem completely. I still would have needed to flip the roast halfway through, though.

Third, slicing thinly does wonders, especially if you can slice across the grain. Chuck tends to be hard to cut across the grain because it's a large, developed muscle. The muscle fibers run in several different directions depending on what part the roast is cut from. If your roast is shaped such that you CAN cut across the grain, it will make the end result that much more tender.

Lasty, gravy improves all things. For the gravy, I moved the roast to a plate and used a little beef stock to deglaze the cookie sheet I had baked the roast on. When all the brown goodness was scraped up, I added the accumulated juices from the plate where the roast was resting, dumped it all into a small sauce-pan, added some coarse-ground black pepper and let it reduce on low for about 15 minutes.


The result of all this yielded slices of meat that were fork-tender, succulent, and full of the big beefy flavor that chuck is known for. So, next time you find yourself with a big piece of chuck, a lot of time on your hands and want to branch out from the run-of-the-mill braise, give roasting a try instead!

Monday, November 5, 2012

green meatloaf

We are fans of meat in this house, as I'm sure you've noticed. I'm always interested in finding new and interesting flavor combinations for meatloaf, especially ones that don't require bread crumbs. I've often had good luck using minced mushrooms in place of bread crumbs in my meatloaf mix, and a recipe I recently found on NomNomPaleo incorporating spinach looked really tasty so I figured I'd give it a try.

The problem with me and recipes, however, is that I tend to find them and think "oh boy that looks good, I'll try that!" and then proceed to basically not follow said recipe at all. It kind of sits there off to the side, looking forlornly up at me and trying to catch my attention as I go totally off the rails, usually in the opposite direction. Fortunately, I tend to end up with things that taste good none the less.


So, having made that point, I will tell you the details of my loaf:

I finely chopped three ribs of celery. three smallish carrots, and about a dozen small button mushrooms, and sauteed them with three chopped slices of bacon until the veggies were soft and the mushrooms had released their liquid. Meanwhile, I microwaved a package of frozen spinach until it was thawed but not super hot. I dumped it into a strainer and let it drain, and put about a pound and a half of ground beef into a big bowl. I added onion powder (I didn't have any fresh onions on hand, which is crazy, I know) and garlic powder, some thyme, some chopped parsley, salt, black pepper, and ground mustard. I cracked in a couple eggs, then added the sauteed veg mix and the well-drained spinach that I had squeezed as much liquid as possible out of. I squished it all together with my hands (my favorite part!), formed it into a loaf, and set it on a rack fit inside a lipped cookie sheet. I took a few extra strips of bacon and carefully laid them across the loaf, smoothing them down to wrap the meatloaf. It went into a 350 degree oven for about an hour - I pulled it when the internal temp hit 150 and let it rest for 10 minutes before serving.

Loaf of meat wrapped in bacon? Don't mind if I do!


For a side-dish I did roasted butternut squash, which is super simple. I used to HATE squash of all descriptions because the only way my mom ever made it was pureed and the texture just gagged me (sorry, Mom). When I discovered that many winter squashes could be roasted and would get a little crispy on the outside but stay soft and fluffy on the inside, I was a happy camper. Butternut squash is a good candidate for this treatment - you just have to make sure that a) you toss it in plenty of oil before it goes in the oven and b) you cook it long enough at a hot enough temperature. I did mine on the bottom rack of the oven at 450 degrees for about 35 minutes, flipping all the chunks about halfway through, and it came out perfectly - nice and crisp on the outside, soft inside. I actually dusted the squash with cumin before roasting, which was good, but next time I think I might use garam masala or regular curry powder, even.

Tasty, veggie-laden meatloaf
The addition of the spinach to the meatloaf didn't really effect the taste at all, but it did add extra nutritional goodness. As you can see from the picture, I could have diced my carrots a bit more tidily and smaller, but it tasted good, chunky carrots and all.

Friday, July 27, 2012

beef and broccoli

Pretty much what it says on the tin. I had some chuck steak to use up and a craving for Chinese. I cut the steak up and marinated it in a mixture of tamari, ginger, garlic, and a splash of sherry. While the meat marinated, I sliced up some white button mushrooms, some white onion, and cut up some broccoli florets. I stir-fried the veggies in some coconut oil first, then dumped them into a bowl (it was truly an unceremonious dumping, I promise you) and stir-fried the meat. When the meat was almost done, I added a cup of beef broth with a tablespoon of corn starch stirred in, and let that come to a boil. I added the veggies back in and tossed everything well to coat, then it was done! And tasty!


Thursday, May 31, 2012

mince curry

During a recent discussion with several online friends about various uses for ground beef, a small revelation was handed down to me: mince curry. ("Mince" is a general term for ground meat - you can have lamb mince, pork mince, etc.) I had never even considered making curry with ground beef until one of said online friends mentioned that her South African step-dad made a really nice mince curry, and then described the general recipe. I drooled a bit reading it, and vowed that I would some day try making it, if my apartment ever came down to a reasonable temperature again.


Today happened to turn out fairly nice and cool (compared to the last few days, anyway), so I decided I'd give the mince curry idea a try.

Mince curry!
Now, I know it doesn't look like much in the picture. Curries don't tend to be particularly pretty affairs, in my opinion. But let me tell you...this stuff? Heaven in a bowl. Maybe it was because I was really hungry. Maybe it was just a good day for curry, I don't know...but honestly, this tasted SO GOOD. I'm a mince curry convert for sure. 

Traditionally, this dish should have peas and potatoes in it, but since I'm not a huge pea fan and I don't eat many potatoes, I nixed them both in favor of cauliflower...but you could easily add them (and whatever other veg you want) back in. Also, if you have a while to cook and you want a richer sauce, you can add the ground beef raw and let it cook right in the sauce - it would probably take 40 minutes or so. I didn't want to wait that long, and since 80/20 was the leanest ground beef I could find at the time and I didn't really want my sauce inundated with fat run-off, I chose to brown my beef beforehand and then chuck it in later.

Mince (Ground Beef) Curry

1 lb ground beef (I used 80% lean), browned
1 head cauliflower, washed, trimmed and cut into bite-sized pieces
1 can coconut milk
1 sm. can tomato paste
1 cup water
1 large white onion, chopped
2 tbsp garam masala
3 cloves of garlic, minced or grated
2.5" worth of fresh ginger, minced or grated
1 tablespoon butter or coconut oil

Melt butter or coconut oil in large pan. Add chopped onion and cook over medium heat, stirring frequently, until onion is soft and somewhat golden. Add garlic, ginger, garam masala and tomato paste. Stir and cook until fragrant - 1-2 minutes. Add coconut milk and water, stir to incorporate. Add cauliflower and browned ground beef, stir well. Cover and allow to cook on medium-low until cauliflower is tender, about 10 - 12  minutes. Serve.


Sunday, March 11, 2012

rogan josh

By now I'm sure you're all well aware of my fondness for all things curry. Mmmm, curry! Curry is not exactly a popular thing in Vermont, at least not in the part I live in. Every town around here has two or three pizza joints, and probably every town (on average, at least) has an Americanized-Chinese restaurant, but any other kind of ethnic food is pretty under-represented. We do have two Indian restaurants "near by" - meaning 30+ minutes' drive away - which means we never go to them.

Instead, I've learned to make my own curry and it's been a rewarding adventure. My first stab at curry was a couple years ago when my (then newly installed) UK-born husband started jonesing for the unofficial UK national dish, Chicken Tikka Masala. I'd never made anything so exotic as curry before, and I was a little nervous as I researched recipes and went shopping for ingredients. However, never one to back down from a cooking challenge, I gave it a go. It turned out yummy, and my husband's high praise gave me the confidence to try other types of curries. I've even converted my "what's in it, is it weird, what does it taste like, I don't know about this" parents into curry fans.

When I got "Well Fed", a Paleo-diet cookbook by Melissa Joulwan, I wasn't sure what to expect - especially after a couple of other sort of disappointing Primal- and Paleo-compliant cookbooks I'd recently bought. "Well Fed" was a pleasant surprise, full of  awesome photos, yummy-sounding recipes, and just the general way the book was put together. One of the recipes that really caught my eye was one for Rogan Josh, which I'd been recently thinking about trying to make. Huzzah! Happy coincidence! I bookmarked the recipe and, a couple weeks later, decided to give it a go.

Obviously I can't type the whole recipe out for you here because that's not cool (buy the book! Seriously! Worth the money!), but I can tell you that the meat is browned on its own (the recipe calls for lamb, but I used beef), and then has a nice long simmer with plenty of onions in a sauce made of cumin, coriander, cinnamon, ginger, and some other spices, along with coconut milk. The resultant texture is silky and lush. We had it spooned over some steamed cauliflower for dinner, and then we ate bowls of it like stew the next day for lunch. It's one of those dishes that improves with an overnight sit in the fridge, too. I'll definitely be adding this to my list of curry can-do's!


Wednesday, February 1, 2012

beef with onions, garlic, carrots and allspice


Pretty much what it says on the tin. I threw a beef chuck roast in the crock pot with a handful of baby carrots (wish I'd had more, honestly...but I ran out), half a sliced onion, three sliced cloves of garlic, some allspice, salt, pepper, a bottle of beer and a cup or so of water. I let it simmer on low all day. When it was done, the beef was literally fall-apart tender. The allspice gives the meat a nice hint of warmness. Not heat, really...but just a warm spicy note. I steamed some broccoli to go with it, which was a nice match. Yummy!

Wednesday, January 11, 2012

steak night

We have steak pretty regularly anyway, but celebratory dinners at our house usually mean GOOD steak. This...was one of those times. I kept swinging between T-bone and ribeye before I got to the grocery store, salivating at the thought of both. Tender, juicy ribeye! Gnaw-the-meat-off-the-bone T-bone! How could I decide?!

When I got to the meat counter, I found two gorgeous ribeyes that made the decision for me. It was a total no-brainer. I brought them home, got my favorite pan ripping hot with some olive oil in it, and started them searing. Meanwhile, there was some asparagus that needed tending to. Once the woody ends were broken off, the asparagus spears went onto a foil-lined baking sheet with a bit of olive oil and a good dose of sea salt. I gave them a roll around the pan to coat, then popped the pan into a 400 degree oven. By the time I got the asparagus in the oven, the steak was ready to flip over (I sear for 3 minutes per side, usually).

Once the steaks were seared on both sides, I put them on another baking sheet in the oven and gave the asparagus pan a shake. To the pan I'd cooked the meat in, I added a sliced onion and some sliced white mushrooms. While everything continued to cook, I made up a vinaigrette of olive oil, white wine vinegar, some Irish stout mustard and a little salt. I tossed some mixed greens in the vinaigrette and plated the salad, then pulled one steak and the asparagus after about 3 minutes (I prefer my steak rare). I left the second steak in the oven for another 3 minutes (my husband likes his steak medium), then pulled it out and let it rest for a few minutes more while the onions and mushrooms finished cooking.

Everything eventually made it onto the plate, and it looked like this:


Ribeye is, generally speaking, well worth the extra money it costs, at least in my opinion. It's flavorful, tender, juicy, and just plain GOOD. These steaks needed no dressing or sauce of any kind. They were just pure, unadulterated beefiness. I wish I had another one for dessert. ;)

Tuesday, January 10, 2012

quick and dirty chili

I know, I know. It's sacrilege to make "quick" chili. It needs a long time to cook over low heat so the flavors can meld, blah blah blah. I KNOW. But sometimes...sometimes I get home from work and need to used a bunch of leftovers and I'm in the mood for chili right then and there. Sometimes I don't have three hours (or far longer) to let it simmer. That's where quick and dirty chili comes in!


I started with some bacon drippings in a big pot, and added a medium-sized onion, chopped up. While the onion softened over medium heat, I chopped up 6 cloves of garlic (I really like garlic, and some of the cloves were small, honest). That went into the pot when the onions were about halfway soft. After that, I had about two cups each of shredded beef and pork left over from the past few days' kitchen exploits which got added in. Next came spices - I used a mixture of 1 Tbsp chili powder, 2 Tbsp ground cumin, 1 tsp oregano, 1/4 tsp cinnamon, and about 3/4 of a tsp of sea salt. I mixed that in and let it cook for another couple minutes, then added a 28oz can of organic diced tomatoes with their juice, and half a cup of water. This all got a thorough stir and then I let it cook on medium-high for about 8 minutes, then spooned it into bowls and topped it with a dollop of sour cream and some chopped avocado. Ta-dah!

Now, I won't lie to you. It wasn't as good as honest-to-goodness, simmered-for-hours chili...but for a healthy, 20 minute start-to-finish meal that used up a bunch of leftovers and got us fed with a minimum of dirty dishes and labor? Pretty damn good. Also, for my Primal- and Paleo-adherent readers, I realize the sour cream is a no-no, but you could easily leave it off and it would be just fine. :)

Sunday, January 8, 2012

beer-braised beef with onions, roasted kabocha squash, brussels sprouts with bacon

We're big fans of meat and beer in this house. Meat and beer, beer and meat. Once in a while I cook meat IN beer, and that makes my husband pretty happy. Today was one of those occasions.


Sorry for the blurry picture - part of the blur is steam, and part of it is from my camera not being able to focus on brown food on a brown plate. I should have known better. ;)

The roast I used was a 2.5lb bottom round roast. The bottom round cut is down on the cow's back leg. This muscle sees a lot of action, of course, so it tends toward leanness and can be tough. One way around this is to roast it and keep it quite rare - another is to braise it, which is what I decided to do.

I liberally seasoned the roast with kosher salt and black pepper, then browned it for a couple minutes each side (including the edges) in a Dutch Oven with a mixture of olive oil and bacon drippings. Once the meat was nicely browned on all sides, I removed it to a plate, then dumped a bunch of sliced onion and garlic into the pot. I let the onion and garlic cook for a minute or two, then added two bottles of Wolaver's Brown Ale, a little salt, some rosemary, and added the roast back in. I covered the pot tightly and turned the heat down to low. It simmered for about two and a half hours, total. By the time it was done, it shredded easily with two forks! The onions cooked down in the beer were spooned over the top of the meat for serving.

For the Brussels sprouts, all I had to do was clean and trim the sprouts, cut them in half, and spread them in a single layer on a foil-lined baking sheet. I chopped up four slices of bacon and added it to the pan over the sprouts, and put the whole thing in a 400 degree oven for 30 minutes, stirring halfway through.

The kabocha squash was a little more work. It has seeds that need to be scraped out, then I pared the skin off, sliced the squash into slices, tossed with olive oil, salt and pepper, and laid them out on a foil-lined baking sheet. These went into a 450 degree oven for 30 minutes, flipping them over halfway through. They came out crispy on the outside and creamy inside, and were really quite addictive.

Wednesday, June 22, 2011

asian cucumber salad with seared flank steak

The recipe for this salad came from Mark's Daily Apple. I wanted lots of veggies but not another lettuce-based salad, and this totally delivered. It's super easy to make, pretty inexpensive if you already have stuff like sesame oil and rice vinegar on hand, and it's super tasty. The recipe calls for black sesame seeds but I couldn't find any, so I just toasted some white ones and it worked fine.

For meat to go with the salad, I wanted to stay kind of in the same flavor area, so I got some flank steak, brushed it with some hoisin sauce, and let it marinate for a while. When I was ready to cook, I preheated the oven to 450, then I got a pan ripping hot and seared the meat off for 1.5 minutes per side. The meat came out of the pan and onto a foil-covered cookie sheet in the hot oven, where it cooked for about 7 more minutes, total. The result was flank steak with a nice sear outside, still mostly rare in the middle, with a nice smoky hoisin crust.

I topped the meat with a little more hoisin, some chopped scallions, and served it alongside a big pile of the cucumber salad.


Nummy!

Thursday, April 14, 2011

Boeuf Bourguignon

Another recipe I tried from Mark's Daily Apple this week was his Boeuf Bourguignon recipe.


I'll tell you right off the bat that I've never smelled anything so amazing in my life as this stuff cooking in the oven for hours. Seriously. If I could bottle that smell, I'd be rich!

Anyway - this is basically just a French beef stew. You start with bacon (how can you go wrong?!), render some fat out of it, then brown a bunch of chunks of beef (I used a big chuck roast that I bought on sale and cut up into bits myself) in the hot bacon fat. The beef and bacon then go into a casserole dish, some seasoned flour is sprinkled over it, and it goes in a 425 degree oven for about 10 or 15 minutes, until the flour is absorbed and it starts to crust a little. Meanwhile, you saute a chopped onion, some minced garlic and a couple sliced carrots in the remaining bacon fat, then add some tomato paste, oregano, bay leaf, parsley, beef stock and wine (I used a cheap cabernet sauvignon to great effect). The liquid simmers for 10-15 minutes and is then added to the meat in the casserole dish. The whole thing goes in the oven for anywhere from 1.5 to 2.5 hours. This is where that whole smell thing comes in. Brace yourself for that, because it's fairly maddening. ;)

The recipe I was working off of called for browning the mushrooms separately and adding them after, but next time I'll just throw them right in with the meat and liquid before it goes in the oven, as I found the un-incorporated mushrooms kinda...meh. I think if they'd had a couple hours of soaking up wine and beef and bacon flavors, they would have added more to the dish. Also, the original recipe called for straining the meat out of the liquid and then reducing the liquid a bit before serving but I decided mine was thick enough and so I skipped that step.

This stuff was truly wonderful. Rich, thick, velvety, with amazing depth of flavor. All of the connective tissue in the beef (which there's a LOT in chuck cuts) melts during the braising and leaves the meat amazingly tender without being fall-apart soft or mushy. I think this has become one of my new favorite dishes. Even writing about it after the fact is making me salivate. I might have to go pick at the leftovers now. ;)

Friday, March 25, 2011

steak salad

Lots of veggies, lots of meat. Just the way dinner should be! This whole thing took me about 15 minutes, start to finish. Not too shabby!


The asparagus and mushrooms were roasted with some halved cloves of garlic and olive oil at 500 degrees for about 10 minutes. Meanwhile, I sprinkled a chuck steak with a little kosher salt. I heated a non-coated pan till it was ripping hot (technical term there...hah!) and then added the steak and let it sear for 5 minutes. At the end of 5 minutes, I flipped the steak and seared the other side for another 5 minutes, then removed it to a plate and let it rest for 5 mintues. The salad was spring mix tossed with a simple balsamic vinaigrette (olive oil, balsamic vinegar, black pepper, dijon mustard). When the asparagus and mushrooms were tender, I added them to the top of the greens while still warm. I sliced the steak against the grain and added it to the top of the salad, poured a glass of wine and voila! Time to eat!

I was a little concerned that the chuck steak (which is quite a cheap cut) might be too tough when cooked like this, but it wasn't too bad. It had some nice marbling to it and produced a lovely beefy flavor, so it was worth a few more chews per bite. :)

Wednesday, March 16, 2011

tortilla-less fajitas

Everything you love about fajitas, minus that pesky flour tortilla! :D


Very simple to make - I took a mostly-frozen piece of London broil and sliced it against the grain as thinly as possible. The marinade for the meat was simply the juice of one lime, a tablespoon of ground cumin, a teaspoon of ground coriander, three grated cloves of garlic, a teaspoon of ground black pepper and about half a teaspoon of kosher salt. I tossed the meat with the marinade and let it sit while I sliced some mushrooms, a large onion, a smallish red pepper, a smallish green pepper and half of a big yellow pepper. The veggies went into a large non-stick pan on medium and were covered. The meat went into a very hot pan with some olive oil in it and tossed pretty much constantly until it cooked through, which only took about 5 minutes. When the veggies were tender, I scooped them onto the plates and topped with the meat. We topped the the "fajitas" with a little plain full-fat yogurt instead of sour cream. Yum!

Sunday, November 28, 2010

spiced pot roast and roasted root veggies


My husband had been lodging official complaints about the lack of meat in the last few meals, so I decided I'd make a nice Sunday roast for him.

I didn't really want to do the traditional "stick the meat in the crockpot and let it cook until it falls apart" thing with the roast. I started flipping through Epicurious recipes and ended up finding something called Boeuf à la Mode, which is apparently some old French-Canadian specialty. Anyway, it's braised beef and onions, but you use a mixture of salt, pepper and allspice for a rub on it. I didn't have any allspice, but I found several references that said I could substitute a mixture of equal parts ground cloves, ground ginger, ground cinnamon and ground black pepper. I did that, and I backed off on the salt by almost a tablespoon because I'm very salt-sensitive. I split the roast into two pieces so it would fit in the pan better, and rubbed the meat with the spice / salt / pepper mixture. I thinly sliced my last four onions (recipe called for 1 1/2 lbs of onions and I was probably somewhat short of that) and finely chopped 6 cloves of garlic. I spread half the onions and garlic in the bottom of the pan, laid the two pieces of meat on top of them, then covered the meat with the rest of the onion and garlic. I covered the pan tightly with foil and put it into a 400 degree oven. After an hour I pulled it out, opened the foil and flipped the meat, then re-covered it and put it back into the oven. It ended up cooking for just about 2 hours 15 minutes, total. The smell was amazing pretty early on, and 2 hours was kind of torturous...;)

The root veggies were Yukon Gold potatoes, garlic cloves, carrots and parsnips all chunked up and tossed with olive oil and thyme. I roasted them on a cookie sheet at 450 degrees for about 25 minutes, stirring a couple of times.

The meat came out succulent. The onions cook down in the fat that renders from the roast, and they are absolutely divine. I could eat a huge plate just of those with some good bread! I was surprised that the combination of what I usually consider "sweet" spices melded so well with the beef, onions and garlic. I'll definitely make this again.

Thursday, September 30, 2010

shepherds pie

Mark has been asking for shepherds pie since the weather got cooler. This is a slightly unintentional twist on it, in that I grabbed ground veal thinking it was ground pork. It ended up being a happy accident.


Shepherds Pie

3/4 lb lean ground beef
3/4 lb ground veal
1 large well-washed leek, chopped (you can use onion instead)
2 large cloves of garlic
2 cups sweet corn (frozen works fine)
4 large russet potatoes
2/3 cup of milk
2 tbsp butter
salt and pepper to taste

Preheat oven to 350.

Peel potatoes, chop roughly and place in a large pot. Cover with water and set to boil.

Meanwhile, brown the veal and ground beef with the leek (or onion). When meat is almost cooked through grate or mince the garlic and add it, stirring well. Allow to cook a couple minutes more. Once cooked through, remove from heat and drain any fat off. Spread evenly in the bottom of a casserole dish and set aside.

When potatoes are cooked through, drain thoroughly. Return to pot, add half the butter and the milk (you may need slightly more or less milk, depending on the texture you like your mashed potatoes. I don't like mine super smooth...I prefer them a little chunky, aka: Irish style...hah!) and mash. Add salt and pepper to taste.

Spread sweet corn over meat layer in baking dish. Spread mashed potatoes over the top of the corn. Dot with remaining butter. Bake at 350 for about 40 minutes, or until warmed through and top is starting to brown.

Saturday, August 21, 2010

Husband-requested meatloaf and onion gravy

My husband likes meat a lot. As in, when I ask him what he wants for dinner, his usual response is "some kind of meat and something to go with it". This afternoon when I asked him if he had any requests for dinner, it went like this:

me: Is there anything specific you want for dinner tonight?
him: Yes! Meatloaf!
me: ...meatloaf? Really?
him: YES! I would like meatloaf and mashed potatoes.
me: Ok. Meatloaf and mash...got it.
him: And peas!
me: Alright...and peas.
him: And onion gravy!
me: Meatloaf, mash, peas AND onion gravy. Sheesh. Ok.
him: *happy grin*

I used to HATE meatloaf as a kid (sorry Mom), so I'm always interested in trying different meatloaf recipes in an attempt to find the perfect one. I came pretty damn close tonight, and the recipe was right in my own kitchen all along! My much-loved and well-used copy of Mark Bittmann's "How To Cook Everything" had a nice simple meatloaf recipe that sounded worth a try. So...I got to work!

The recipe calls for 2 lbs of ground meat, and Bittmann suggests mixing beef with something else - veal, pork, what have you. I used a pound of nice lean ground round, and a pound of ground pork. I added breadcrumbs soaked in milk, a beaten egg, salt and pepper, some grated garlic, a smallish onion (also grated - it's way less work than mincing), and chopped parsley. The recipe called for sage, either fresh or dried. I was out of sage, which I didn't realize until I was elbow-deep in meat, so that was a bummer and I had to skip it. It also called for a minced carrot. I grated mine instead of mincing it. I mixed everything up by hand (my least favorite part) and formed it into a loaf on the rack of my broiler pan. I like cooking it this way rather than in a loaf pan because then you get a nice crust on most of the surface. A lot of what I never liked about meatloaf as a kid was the texture of it after it had cooked in a loaf pan in its own grease. Blech. Anyway - I liberally applied a layer of HP Sauce on the surface of the loaf, and popped it into the oven at 350 and cooked it for about an hour.

While the meatloaf was cooking I peeled 5 big russet potatoes and cut them into medium chunks. I boiled them till tender, then drained them and set them aside. For the gravy I thinly sliced one large white onion and cooked it down in a pan with about 2 tbsp each of olive oil and butter (hey, I didn't say it was healthy...that's why we don't have it every day or even every week). When the onions were nicely browned and softened I sprinkled 2 tablespoons of all purpose flour and a little black pepper into the pan and stirred thoroughly. I let the roux cook to a dark golden color, then added in about half a cup of beef stock and whisked vigorously. I let that cook about 30 seconds until it thickened, then added more stock and whisked again. Once it thickened up the second time I added the rest of the stock and whisked again, then turned the heat down and let the gravy bubble gently and reduce.

The potatoes were ready to mash at this point so I tossed in some butter and milk, salt and black pepper, and mashed away. I can never get them entirely smooth but I don't mind, really. Having some lumps in them reassures me that they're real potatoes, I think. ;)

The meatloaf came out of the oven just as the gravy was getting thickened up again. I put half a bag of frozen peas in a pot with 1/4 cup of water and covered, letting them steam while the meatloaf rested. When the peas were done, it was time to eat!


I don't have a gravy boat so yes, my gravy was in a Campbell's Soup cup. ;) The meatloaf was, in a word, wonderful. Really and truly. It was incredibly juicy without being greasy, and it had such good flavor. I can only imagine that having the sage would have made it even better (because I love sage). The only thing I'd change about the meatloaf recipe is that next time, I'll omit the carrot. It just didn't add to the flavor in a constructive way, I didn't think. I kept noticing it and thinking "what's that I taste? Oh, carrot again...yeah..." Other than that, this is most certainly going to be my go-to meatloaf recipe from here on out.


See how juicy? NOM! Also, this is a good shot of my gravy. I originally came up with the gravy recipe when Mark was explaining "Bangers and Mash" to me, since I'd never had it. It took a couple tries to get it right, but now that I've got it down, it's super easy (though not quick).

Mark is already looking forward to meatloaf sandwiches for lunch tomorrow! ;)