Showing posts with label primal. Show all posts

Friday, March 6, 2015

glazing my thighs

No, I will never tire of post-title innuendo (in YOUR end-o!). Not even sorry.

Anywho.

I've been kind of obsessed with the half-stove-top, half-oven method of cooking chicken thighs lately. It's an easy and reliable way of getting super crisp skin on the thighs without having to coat them in something like panko or cornmeal. I'll admit, it's kind of messy if you don't have a splatter shield, but even so, it's totally worth an extra wipe-down of the stove-top, in my opinion.

When I was making up my menu last weekend and saw chicken thighs on sale again, I thought to myself, "Self...why couldn't we use the stove-top-then-oven method to make some super crisp chicken thighs, then stir up a little batch of the glaze we use on chicken wings and dump it over the thighs instead? Doesn't that seem like a good idea?" It DID seem like a good idea, so I rolled with it, and this is what I ended up with:

So crispy. Much nom.


For the glaze, I used a mixture of fresh grated garlic and ginger, some tamari, some honey, toasted sesame oil, and a splash of water. I always add the water thinking that the glaze needs to be thinned out, and I always regret having added the water when I go to taste the glaze and it tastes...watered down. Welcome to my life. In retrospect, I could have reduced the glaze down in a pan to cook some of the water back out, but that sounds like a lot of work.

I started the chicken thighs out in a hot pan with a little coconut oil in it (skin-side down, duh), and let them fizzle and splatter happily for about 8 minutes until the skin was good and crispy and brown. Then I flipped the thighs over in the pan, turned off the heat, and spooned my glaze mixture over the meat. The pan then went directly into a 425 degree oven (use an oven-proof pan, friends...I will not be held responsible for you melting the handles off your pans) for about 15 minutes until the thighs read 165-170 degrees, at which point they were done. Huzzah!

The veggies were very simple: I cut up carrots, onion, radishes (I had some hanging around I wanted to use up), and two broccoli crowns, and quickly stir-fried them in a very hot pan with a little coconut oil. The broccoli was being slightly uncooperative and didn't want to cook through as fast as everything else did, so I threw a lid on the pan and let it steam for a few minutes to finish it off.

This dish is gluten-free (as long as you use tamari rather than soy sauce), and if you wanted to be super-strict Paleo you could sub the tamari for coconut aminos and get extra, uhh...dinosaur points.

Get it? Paleo? Dinosaur? Nevermind...


Tuesday, February 24, 2015

take your sweet potatoes and stuff them.

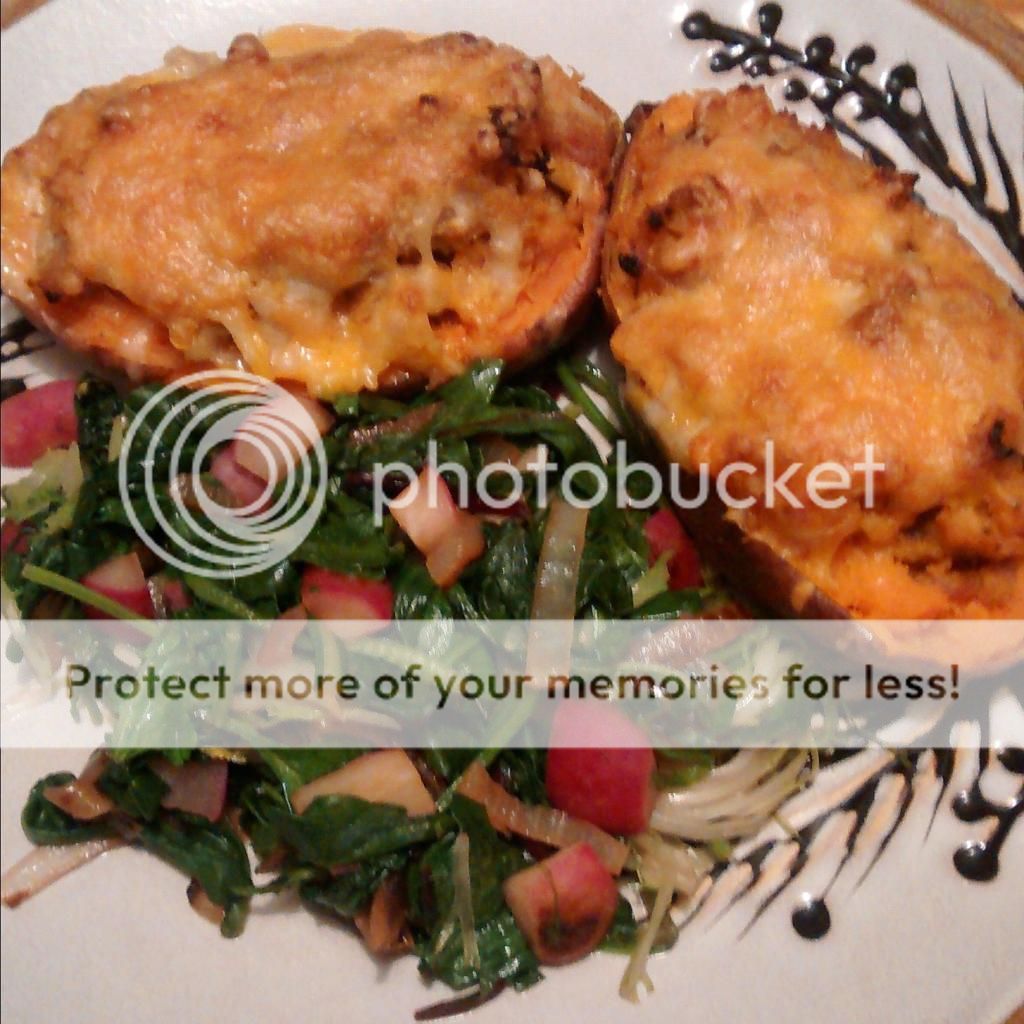
The meat-department gods saw fit to put pork butt on sale this week, my friends. You know what that means: another installment in the "what do I do with all this leftover pulled pork" files! Today the answer happens to be, "Stuff it in your sweet potatoes", which sounds like not only an awesome euphemism but also a good culinary idea.

Everything is better with cheese. FACT.

Obviously, this project starts with the assumption that you have some leftover shredded pork butt. Mine was just plain, not sauced, but I'm sure that sauced-up pork would be just as delightful in this application.

You're also going to need some sweet potatoes, obvs. I used two medium-sized ones to feed myself and the Ginger Beast, and honestly, it was a lot. Next time I'd either just serve half a potato each, or use smaller potatoes.

Anyway - you can bake the sweet potatoes ahead in the oven if you're fancy, but I'm personally really fucking lazy about shit like that, so I just cut a slit in each of mine and throw them in the microwave on the "potato" setting until they're done. These two took about 12 minutes total, and I flipped them over halfway through.

Once the potatoes are cooked, split them in half and scoop out all but a little bit of the flesh from the skin (that sounds totally sinister, sorry). You want to leave a little rim around the edges so that the skins keep their general shape. The scooped-out flesh should go into a bowl big enough to mix some other stuff into. Also, side-note between you and me? This whole flesh-scooping thing is WAY fucking easier to do if you let the potato COOL DOWN a little first, says she who now sports steam-burns on her left. hand. Yes, that type of thing is probably obvious to most people, but a) I am the queen of impatient and b) I am not most people. So I'm just throwing it out there.

Where was I? Oh, yes, potato flesh in the bowl. To that, you're going to add the pulled pork. I used like two cups or so of pork because we are hungry, hungry hippos. Use less if you're on a diet or you hate the world or something. I also added a pinch of kosher salt, a shake of black pepper, a teaspoon-ish of ground cumin and a half a teaspoon-ish of ground coriander seed. Also, and this is KEY, the juice of one fresh lime. It's really good, trust me on this.

So, mix all that stuff up in the bowl until it's well-combined. At some point you should have pre-heated your oven to like 450 degrees - I should have mentioned that earlier, sorry. You also need a baking dish. Surprise! This is how my ADHD-addled brain actually works when I cook, by the way. All these recipes I post where I have measured nothing, timed nothing, and can only remember half of what I put in the pan? Welcome to my life, pumpkins. This is how I roll.

Side-tracked again, sorry. So, yes. We're stuffing the pork-mash mixture into the hollowed-out potato skins. It's probably best to do this once you've placed the skins IN the baking dish, otherwise you might end up with one falling apart, pork and sweet potato all over your floor, and the happiest dog in the history of life (assuming you have a dog. We do. He would have been ecstatic, trust me). Once you've stuffed the skins, you can sprinkle some shredded cheddar on top for extra tastiness. Put that whole mess in the oven and let it fester for...oh...I don't know, like 15 or 20 minutes? Long enough for the cheese to reach golden-brown deliciousness status. When you've achieved said crispy cheese enlightenment, BOOM...you're done. Well, the potatoes are done, anyway.

If you want to experience the delight of the side-dish as pictured, that's super simple as well. It's just a baby mixed greens blend (I like the Olivia's Organic saute blend, personally) that has been sauteed with some onion and chopped radish (JUST TRY IT, OK?! Stop making faces. I would not lead you astray. Much...). I use a dab of bacon fat as my saute medium for this, and I add the onions and radishes first to let them caramelize a little before adding the greens in, because those cook really quickly. Oh, and a pinch of kosher salt. Unsalted greens are sad greens, yo. The better your bacon fat, the better the greens will be, as well. Mmm, smokey!

AND, for anyone playing the Paleo / Primal game at home, this meal would easily be considered Paleo if you left off the cheese, and is Primal-compliant as-is. It's also gluten-free, cha-cha-cha!

Tuesday, October 1, 2013

oh hey, I made some chicken, did you want to see it?

Sorry I've been gone for almost a YEAR. Sheesh. My camera went to hell a while back and I didn't see much point in blogging about food that I couldn't show you, so...yeah. Hubs got me a new camera for our anniversary though, so I'm back in business...and business is TASTY! 

I found this recipe for "spicy crusted chicken" in an old Indian cookbook I picked up at the Five Colleges booksale last spring. The whole book seemed to be basically variations on a theme: brown some onions! Add these five or six spices! Add some meat! Serve with rice and or bread! Which, don't get me wrong - I love me some curry (and some rice), but a) I already know how to make curry and b) I try not to eat too much rice. This recipe caught my eye, though. It looked almost like Indian spiced Shake-n-Bake in the picture. The coating looked crunchy, and the ingredient list was totally Paleo-friendly aside from the yogurt it called for. And honestly, if I'm going to make concessions, yogurt is a very fair thing to make them for.

First thing the recipe has you do is brown an onion in 2/3 cup of oil. That's...a lot of oil. Especially for just one onion. Then you toast some ground almonds and unsweetened coconut in a hot pan. That made the most epic and mouth-watering smell imaginable! Then you take some yogurt and add garam masala and some salt to it, add the toasted almond and coconut, add the sauteed onions and give a good mix.

Now - I did something fairly wrong here. I used a good stiff Greek yogurt (Fage 2%) because that's what I had in stock...but I think I would have better results with a non-strained yogurt. My spice crust mixture basically came out the consistency of Play-Doh. The recipe was all "pour this fragrant mixture of loveliness over the skinned chicken!" and I was like "Ain't no pouring this, Sandeep."  I schmeared the stuff onto the chicken instead. I molded it. I...may have made a couple into vaguely X-rated shapes. Anyway - I got it all on eventually and baked the chicken in a 325 degree oven for about 35 minutes. The chicken was cooked through but not crispy at all at that point, so I cranked the oven up to 475 and let it sizzle for 10 more minutes. The topping was starting to get a little crispy at that point, but I think it was just too thick and wet to really get crunchy. It still tasted REALLY good, though.

Next time i clearly need to use a thinner yogurt. Also, I'm going to marinate the chicken in the yogurt and spice mixture for a while, then roll it in the toasted coconut / almond mixture right before cooking. I think that will not only infuse the chicken with more spice flavor, but will also make the coating more crunchy. Definitely going to cut waaaaay down on the oil I cook the onion in because that was just silly. I might even skip the oil and just cook it in ghee to add another layer of flavor. Finally, I think I'll add more garam masala than the 1.5 tsp the recipe called for, because it just wasn't aggressive enough for my tastes. It was kind of like "indian" instead of "INDIAN!!", if you see what I mean.

Even with all the clunky parts and mistakes, it was still really damn tasty, though.

Tastes like chicken!


Thursday, July 19, 2012

eat more fish

I'm making it my mission to eat more fish. Fish is what we evolved eating, and it's what our bodies and especially our brains need to run effectively. Fish is like jet fuel for your brain. A serving of fish a day can lower blood pressure, improve your resting heart rate, lower cholesterol and triglycerides, improve your insulin sensitivity, and on and on. Seriously. Start eating more fish...your life will be better for it!

The fish of choice tonight was cod. I was wandering around the produce aisle, wondering what I'd have with said cod, when something slightly alien-looking caught my eye. Broccoli rabe! I almost never see it available at my local grocery store, so I snapped a bunch up. Never mind that I'd never actually cooked it or even tasted it before. When has that ever deterred me?! I knew it was meant to be fairly bitter, but that was about it. I put it in my basket anyway, thinking to myself  "this is what Google is for, clearly".

Turns out one of the traditional Italian ways to cook broccoli rabe is to blanch it in some boiling water, and then sautee it in some olive oil and garlic until it's tender. Well that was certainly do-able! I gave it all a good rinse, then cut off the tough ends of the stalks. In retrospect, I should have cut more off, but now I know for next time. I dunked it all into a pot of boiling water for about 5 minutes, then drained it. I added some olive oil and sliced garlic to the pan and let it warm up, then added the rabe and gave it a few good tosses before shutting the heat off.

Before tackling the rabe project, I had preheated the oven to 425. I cut up about 1 3/4 pounds of cod filets, placed them on a baking sheet lined with parchment, and drizzled them with olive oil. A little black pepper completed the picture, and into the oven they went, for about 12 minutes (as the pieces were pretty thick. I checked at 10 minutes and they weren't quite done). I scrubbed and cut in half a sweet potato and put it in the microwave for about 8 minutes while everything was cooking, as well. Everything basically got done at the same time - fish came out, greens were wilted, sweet potato got scooped out of the skin and mashed up with a little Kerrygold butter (it's made from milk from grassfed Irish cows. Very tasty, and super good for you too) and a touch of salt. I also added a touch of salt to the greens, plated everything up, and it was time to eat!

Cod, sweet potato, garlicky broccoli rabe
The rabe and sweet potato actually made really nice counterpoints for each other - sweet, rich and velvety potato against bright, nutty, slightly bitter, almost floral-tasting rabe...and all against a background of tender, juicy fish. YUM!

So there you go. Fish can be quick and easy, and it's super good for you. EAT MORE FISH!

spanish-style chorizo and shrimp

Monday afternoon at work, I was trawling on Ravelry during my lunch break, as I am often wont to do. Someone had posted a thread asking what to do with Mexican chorizo for dinner. I suggested chorizo, kale and runny-yolked eggs, because that dish makes my heart go pitter-pat...but it also got me thinking about chorizo. Pretty much all afternoon, I was dreaming of it - fried, scrambled with eggs, in tacos, in soup...you name it, I probably thought about eating it. Unfortunately, my local grocery store only has the Spanish / Portuguese style of chorizo, not the Mexican kind....but the more I contemplated, the more I decided I wanted chorizo enough that I could make due with the cured Spanish kind.

Toward the end of the afternoon, an idea struck me: I bet chorizo would be good with shrimp! A little Googling brought me round to this recipe. I ended up following it pretty much to the T, except that I only put in half the salt it called for, and instead of serving tapas-sized portions with bread, I loaded plates up with sauteed spinach and served big portions.

This came out really well, and I'd absolutely make it again, though I WILL say: I only used half of the salt the recipe called for and it was still VERY salty. I would knock the salt back even further next time, for sure.

Shrimp and chorizo sausage

Sunday, July 8, 2012

mussels

I had a hankering for mussels, and there were some nice-looking ones at the grocery store tonight. I brought them home, trimmed the "beards" off, gave them a good bath and scrub in cold water, and then set them to steam in a bit of chardonnay laced with olive oil and garlic. When the mussels were done (about 8 minutes), I scooped them out with a slotted spoon and set them aside while I reduced the cooking liquid and then added some butter and black pepper to it. I ran the sauce through a strainer into a little bowl, then sat back and happily nommed on mussels dipped in butter sauce. If you were a pasta person, you could pick all the mussels out of the shells and toss them with the sauce in some linguine...but I liked them just fine plain, with a nice cold beer. The only thing better would have been eating them on the beach up in Maine with my toes in the sand.

Maine wild-caught mussels with butter sauce

Friday, April 20, 2012

chicken piccata

Pretty much what it says on the tin:

As you can see, I over-parsley'ed the sauce a bit, but it was none the worse for wear from it. I was being lazy and just rough chopped the parsley rather than mincing it. It's Friday, sue me.

Chicken piccata is dead easy to make - just split a couple chicken breasts into cutlets (you can pound them thin if you want, but I didn't bother and it came out just fine), brown them up in some butter and oil, then add some more butter, wine, lemon juice, parsley and capers to the pan to make a sauce, and you're ready to roll! It seriously takes longer to prep everything than it does to cook it. I paired the piccata with asparagus because it's in season, and because asparagus plays nicely with the flavors of white wine and lemon. It worked out very nicely.

Chicken Piccata
(serves 3 hungry adults)

3 boneless skinless chicken breast halves, split horizontally into cutlets
3 tablespoons unsalted butter
1 tablespoon olive oil (regular - don't use extra virgin)
4 tablespoons dry white wine (I used chardonnay)
2 tablespoons jarred capers, drained, rinsed well and chopped
1/2 a cup (or so...haha) minced parsley
2 bunches of small-diameter asparagus (mine was mostly pencil-sized), steamed to your liking

Split the chicken breasts horizontally into cutlets and lightly season with salt and pepper. In a heavy skillet over medium-high heat, heat oil and 1 tablespoon of butter until butter stops foaming. Carefully add chicken to pan. Cook, working in batches if necessary, for 1-2 minutes per side until just cooked through. Remove chicken to platter (I put mine in a preheated 200 degree oven with foil over while I finished the rest of the chicken and made the sauce). Pour fat out of skillet, then add the remaining 2 tablespoons of butter, the wine and the lemon juice. Let come to a boil, stirring to loosen brown bits from bottom of pan. Stir in the capers, parsley, and salt and pepper to taste, and remove from heat. Serve chicken over bed of steamed asparagus, with sauce spooned over.

If you're a starch eater, this would be good with pasta, rice pilaf, or even some garlicky mashed potatoes.

Tuesday, April 10, 2012

thai red curry fish stew

I was thinking about dinner on the way home tonight (as usual), and trying to think up a way to use leftover chicken thighs. Somehow, stir-fried chicken thighs morphed into chicken curry, which morphed further into thai red curry with shrimp.

Shut up, I'm complicated.

By the time I got to the grocery store, I had a plan. I was going for shrimp, and mussels if I could find them. If not, I was going to try fish. The idea of fish curry scared the crap out of me. I've had it before and I knew I liked it, but I'm not generally super good at cooking fish and the idea of it just makes me nervous.

Lo and behold, there were no mussels at the store, so I grabbed a bag of shrimp and lovely big cod fillet, along with some zucchini and cauliflower, coconut milk and red curry paste. When I got home, I thawed the shrimp under cold running water while I sauteed some chopped onion in coconut oil and red curry paste. I added the coconut milk, some fish sauce, chopped zucchini and cauliflower, unsweetened shredded coconut, and some water and let it all simmer for about 10 minutes. When the veggies were basically tender, I added the shrimp and chopped-up cod and let the whole thing fester for about 5 more minutes, then shut the heat off. I scooped some into a bowl and added a bit of fresh basil.

Here are the fruits of frankly not a whole lot of labor on my part:


It was everything I was hoping for. The only criticism I have is that I should have had two cans of coconut milk rather than just one, because more sauce is better!

Sunday, April 8, 2012

Easter dinner

We didn't do much for Easter this year because my husband had to work early in the morning, but I did manage to pick up a small boneless ham and some veggies for roasting, all of which came out quite well.

I had a couple pieces of prosciutto left over from the pork chop project the other night, so I got all fancy and made asparagus bundles wrapped in prosciutto, with a bit of Parmesan on to. The cheese doesn't look very toasty in the picture, but it actually crisped up nicely. The veggies are my usual potato / carrot / radish / onion / Brussels sprouts with a bit of bacon added. So, all in all, we had a pretty pork-tastic Easter!

Wednesday, April 4, 2012

prosciutto mushroom stuffed pork chops

As many of my cooking stories begin, so does this one - trawling through the meat department at the grocery store. I encountered a pair of nearly-two-inch-thick boneless pork chops that just begged to be stuffed, so home with me they came! Here's what I did with them:

The stuffing is a quick and simple combination of minced onion, white mushrooms, garlic and thyme, sauteed in a little butter. I cut a deep pocket into each chop, laid a piece of prosciutto into each one along with a piece of fontina cheese, then stuffed the mushroom mixture in. I pan-seared the chops for 2 minutes per side, then put them on a pre-heated pan in a 450 degree oven. The chops baked for 10 minutes while I steamed some asparagus, then it was time to eat.

As you can see, my stuffing started to fall out as I was taking pictures. I usually tie meat up with kitchen twine when I've stuffed it, but I didn't bother this time...and I re-learned my lesson! Other than the stuffing falling out, these came out quite well. I really like fontina cheese - it melts so smoothly, and it has a really nice nutty flavor that, in this dish, mixed nicely with the sweetness of the onions and the saltiness of the prosciutto.

Sunday, March 11, 2012

rogan josh

By now I'm sure you're all well aware of my fondness for all things curry. Mmmm, curry! Curry is not exactly a popular thing in Vermont, at least not in the part I live in. Every town around here has two or three pizza joints, and probably every town (on average, at least) has an Americanized-Chinese restaurant, but any other kind of ethnic food is pretty under-represented. We do have two Indian restaurants "near by" - meaning 30+ minutes' drive away - which means we never go to them.

Instead, I've learned to make my own curry and it's been a rewarding adventure. My first stab at curry was a couple years ago when my (then newly installed) UK-born husband started jonesing for the unofficial UK national dish, Chicken Tikka Masala. I'd never made anything so exotic as curry before, and I was a little nervous as I researched recipes and went shopping for ingredients. However, never one to back down from a cooking challenge, I gave it a go. It turned out yummy, and my husband's high praise gave me the confidence to try other types of curries. I've even converted my "what's in it, is it weird, what does it taste like, I don't know about this" parents into curry fans.

When I got "Well Fed", a Paleo-diet cookbook by Melissa Joulwan, I wasn't sure what to expect - especially after a couple of other sort of disappointing Primal- and Paleo-compliant cookbooks I'd recently bought. "Well Fed" was a pleasant surprise, full of  awesome photos, yummy-sounding recipes, and just the general way the book was put together. One of the recipes that really caught my eye was one for Rogan Josh, which I'd been recently thinking about trying to make. Huzzah! Happy coincidence! I bookmarked the recipe and, a couple weeks later, decided to give it a go.

Obviously I can't type the whole recipe out for you here because that's not cool (buy the book! Seriously! Worth the money!), but I can tell you that the meat is browned on its own (the recipe calls for lamb, but I used beef), and then has a nice long simmer with plenty of onions in a sauce made of cumin, coriander, cinnamon, ginger, and some other spices, along with coconut milk. The resultant texture is silky and lush. We had it spooned over some steamed cauliflower for dinner, and then we ate bowls of it like stew the next day for lunch. It's one of those dishes that improves with an overnight sit in the fridge, too. I'll definitely be adding this to my list of curry can-do's!


Friday, February 24, 2012

slow-cooker pulled pork carnitas

Carnitas are usually made of pork that has been cut into chunks and slow-cooked in fat, then crisped up before serving. Since I usually have to spend eight hours a day at a place called "work" and I don't have three hours AFTER work to wait for dinner, I decided I wanted to try doing a slow-cooker version of carnitas instead.

Part of what makes carnitas so good is the crispy rendered bits of meat. When you're cooking a pork butt in a crockpot, you don't get those bits. I came up with two ways to deal with this, each of which was only moderately successful on its own, but done in conjunction seemed to really make a difference. The first thing I did was brown the entire roast, one side at a time, in a very hot pan. This ensured that I'd at the very least not end up with flabby chunks of fat in the crock-pot at the end of 10 hours of cooking. It also, I think anyway, made the flavor of the meat deeper than just plopping it in the slow-cooker would have. The second thing I did was, after shredding the cooked meat, I spread it out in a wide, shallow pan and chucked it into a 450 degree oven for 10 minutes. The top surface of the meat got nicely crisp and did a good job of emulating the crispy bits of traditional carnitas.

I used Bibb lettuce leaves to pile the meat and toppings on rather than tortillas. As you can see, I went for avocado, cilantro, radish, white onions, and there's actually some salsa, lime juice and full-fat Greek yogurt in there, too. Some people look askance at me for putting radish on my tacos like this, but I really like the crunch of them, especially with all the softness of the meat and the avocado.

I'm fairly happy with how these came out, but I'll definitely try them again with the addition of some citrus juice and spices to the cooking liquid. This time around, I just used a little chicken stock, a bunch of minced garlic, salt, pepper and oregano. I did mix some onion powder and and cumin into the meat as I was shredding it as well, but next time I'll definitely add these at the beginning of cooking so to better infuse the meat with flavor.

Sunday, February 19, 2012

salmon en papillote

In an attempt to be more healthy last weekend, I decided we need to eat more fish. I bought a bag of frozen wild-caught salmon fillets at the grocery store and chucked them in the freezer. Yesterday afternoon, whilst peering into the depths of the freezer and thinking about what to make for dinner, the bag of salmon caught my eye. It was honestly less of a burning desire to eat the fish and more of a guilt thing over having spent money on it but not used it that made me pull two fillets out of it...but the point is that I DID pull two fillets out, defrosted them, and cooked them for dinner.

I wanted to jazz the salmon up a little, since frankly neither my husband nor I tend to get too excited about fish unless it's beer-battered and served with a heap of fries and malt vinegar. Flipping through several cookbooks yielded little inspiration - everything seemed to be calling for sugary glazes to coat the salmon with, and we're doing our best to cut sugar out of our diets. I remembered an episode of Good Eats I saw years ago, where Alton Brown cooked salmon in these nifty parchment pocket things - you pack the fish and whatever else you want to go with it into a parchment pocket, seal it up, cook it, and everything lightly cooks itself in the trapped steam. It sounded like the beginnings of a good idea, so I turned to trusty Google and found an old Julia Child recipe for Salmon en Papillote with Tomatoes and Shallots. Winner, winner, fish for dinner!

The recipe, found below, is super simple as long as you can get your hands on some parchment paper. All you really need to do is season the fillets and then place them on the parchment with your chosen vegetable accoutrements, like so:


Then, you do a little origami practice to seal the packets up, like so:


 NOTE: Gods, how I tried to do these packets into nice neat rectangles by folding the ends of the parchment over in the middle and then creasing the ends closed, but they WOULD NOT stay closed no matter what I did, so I regrouped and did it Alton Brown's way. Worked so much easier. I wish I'd have just done it that way to begin with, as it would have saved me a good 20 minutes of paper-crackling and swearing and muttering about having quit drinking too soon.

These packets then go into a 425 degree oven for about 8 minutes or so. The only thing I found frustrating about this cooking method (other than the above-mentioned packet-making debacle), was that when it came time to check the fish to see if it was done...I couldn't, at least not without ripping open one of my carefully constructed packets. That was mildly annoying. I cracked one open and deemed it done, but if it hadn't been, I suppose I'd have had to just stick them back in the open ripped open and hope for the best.

Anyway, this was the end result:

It was pretty tasty, though I'd like to try the same recipe again with fresh fillets rather than previously-frozen ones. I think, with salmon at least, freezing just does something unfixable to the texture of the fish. I enjoy fresh a whole lot more than frozen, but this was still certainly decent. As you can see, I added some asparagus and a side-salad with a nice bright lemon-garlic dressing.


Salmon En Papillote with Tomatoes, Shallots and Asparagus
Serves two

1 medium bunch of asparagus (or about 6-8 spears per person, depending on how much you like asparagus), woody ends broken off
2 Roma tomatoes, washed and chopped
1 large or 2 small shallots, chopped fine
2 4oz salmon fillets, fresh or defrosted
salt and pepper
small amount of butter for applying to parchment and topping vegetables
parchment paper

1. Pre-heat oven to 425 degrees. Season salmon fillets with salt and pepper. Rip off a piece of parchment about 16" long. Lightly rub center of parchment with a bit of butter. Arrange half of asparagus on parchment. Place one salmon fillet atop asparagus. Add half of chopped tomatoes and half of chopped shallots atop salmon fillet. Top with a dab of butter.

2. Carefully fold parchment over fish and vegetables and work your way around the edge, folding paper over and crimping as you go.When you get to the other corner of the packet, crease the paper and fold the remainder UNDER the packet. This will keep it closed and keep the packet air-tight.

3. Repeat with remaining ingredients.

4. Place packets on a cookie sheet and place in 425 degree oven for about 8 minutes (my fillets were about 3/4 inch thick. If you have thicker ones, you'll need to adjust your cook time up by a couple minutes).

5. Remove packets from oven, open carefully, and serve.

Note: If you're interested, the dressing on my salad was a vinaigrette made with the juice and zest of one Meyer lemon, some extra virgin olive oil, a small dash of white wine vinegar, a little salt, and one clove of garlic, minced.

Friday, February 17, 2012

chicken curry with cauliflower "rice"


This is SO good, and it's super easy, trust me. This dish took me 30 minutes, start to finish, and that was with nothing prepped ahead of time (because, frankly, that's usually how I roll). Lightly mashed cauliflower actually makes a really nice rice substitute, and it's really not much more work than actual rice. The key is to get the cauliflower going before you do anything else, because it takes the longest to cook.

See? Looks like rice!


Chicken Curry with Cauliflower "Rice"
6-8 servings

1 large head cauliflower
1 can coconut milk
2lbs boneless skinless chicken thighs
1 tsp coconut or olive oil
1 large onion, chopped
4 cloves garlic, grated or minced
2 tablespoons ginger, grated or minced
1 tablespoon garam masala
1 28oz can diced tomatoes (I use the no-salt-added organic ones)


1. Put a large pot of water to boil on high heat. Add a pinch of sea salt. While waiting for water to heat, trim and rinse cauliflower, and chop roughly. It doesn't need to be chopped fine, just chunk it up into pieces that are all roughly the same size. Put chopped cauliflower into boiling water, turn heat down to medium, cover. Allow to boil for around 10 minutes. You want it fork-tender, not mushy. Alternatively, you could steam the cauliflower if you've got the set-up for it.

2. Heat a large pan over medium-high heat and add olive or coconut oil. Working in batches, sear chicken thighs for about 2 minutes per side, then remove to a plate and set aside. Don't worry, the chicken will finish cooking in the sauce in a few minutes.

3. Once chicken has been seared, add chopped onion to pan. Cook, stirring frequently, until onion becomes golden. Add in garlic, ginger and garam masala, stir well to coat. Cook this for about a minute, or until the spices become fragrant.

4. Add chopped tomatoes and coconut milk, stir well to combine. Roughly chop up the chicken thighs into 1"-ish pieces and add to sauce. Stir, then turn heat to medium-low and allow to simmer while you prepare cauliflower.

5. Carefully drain cauliflower and return to pot. Mash into small bit - I use a standard-issue potato masher for this. Just remember that you want a rice-like consistency. You'll know it when you see it:

6. When the chicken has no visible pink left, the sauce is done. Scoop some cauliflower "rice" into a bowl, spoon some sauce and chicken chunks over it, and enjoy!

So there you go. Flavorful chicken curry that's quick, easy, pretty cheap, low-carb, and really very tasty.

Wednesday, February 15, 2012

pork chops with dijon pan sauce

Nothing too ambitious tonight, really...especially after the fancy-pants dinner we went out for last night! I had some boneless pork chops defrosted that I needed to use up, but I really wasn't in the mood for a stir-fry, so I decided I'd pan-sear the chops and make a little sauce to go with them. This is what I came up with!
It may not be much to look at, but this was actually very tasty. I started by heating up some olive oil and searing off my chops, then removed the chops from the pan and deglazed with about a cup of chardonnay. I added two large chopped shallots, a tablespoon of butter and a tablespoon of dijon mustard, then gave it a good whisk to make sure all the good bits got scraped up off the bottom of the pan and everything got combined well. I turned the heat down to low and added the chops back to the pan along with their accumulated juices. I let them cook on low for about 6 more minutes while I quickly steamed some broccoli. The chops then came out of the pan and the sauce was spooned over, and voila! Quick, easy, healthy dinner.

Monday, February 13, 2012

shrimp and asparagus with garlicky lemon butter sauce - now with a real recipe!


This is very easily one of my favorite things I've cooked since I started this blog, and I just totally made it up as I went along so I'm super proud of myself!

I started with some butter in a pan, added a couple cloves of chopped garlic, and added a big bunch of asparagus that I had rinsed and chopped into 3rds. After a few minutes, I added about a cup of white wine, some salt, black pepper, and the juice and zest of one Meyer lemon. I tossed the shrimp into the pan (I had a bag of frozen peeled raw shrimp that I'd thawed and taken the tails off earlier) and let it all cook for 3-4 minutes until the shrimp just started to turn opaque. I added another small pat of butter to thicken the sauce up a bit, then spooned it over some spaghetti squash I'd prepared previously.

The combination of lemon, garlic and butter is one of my favorite tastes anyway, but the slight sweet nuttiness of the spaghetti squash and the shrimp elevated the sauce to another level. It was really good, and I'll definitely be making it again!

2/14/2012 NOTE:

Due to several requests, I have cobbled together an actual recipe for this meal, found below. Just in case you're a measure-y type of person. ;) I'm doing this from memory way after the fact, so if you follow this to the letter and it explodes into a pile of epic suckitude, I apologize.


Shrimp and asparagus with garlicky lemon butter sauce

1 lb of UNCOOKED, peeled & de-veined shrimp (I took the tails off mine before cooking but you don't have to)
1 large bunch of asparagus, trimmed of woody bits and chopped into 3rds.
3 tbsp butter
1/2 cup white wine (I used chardonnay)
zest of 1 Meyer lemon
juice of 1 Meyer lemon
3 cloves of garlic (or more, to taste)
salt and pepper to taste
3 - 4 cups of prepared spaghetti squash (or pasta if you like) - directions below!


Melt 1 Tbsp of butter in a large saute pan over medium heat. Add garlic, let cook for about a minute or until fragrant. Be careful not to burn garlic - if it seems like it's cooking super quick, turn your damn heat down a little.

Add wine, lemon juice, a little salt, and asparagus to pan, tossing / stirring to coat. Let cook, stirring frequently, for about 3 minutes, until asparagus starts to soften just slightly.

Add shrimp to pan, toss to coat, cook for 3-4 minutes until shrimp JUST BARELY begins to look opaque and pale pink.

Add lemon zest, black pepper and 2 tbsp of butter, mix well, cook another 3-4 minutes until asparagus is tender and shrimp is done (it will be totally opaque when it's done). Taste sauce for seasoning, add salt and pepper to taste.

Serve mixture over 1 cup of prepared spaghetti squash.


To prepare spaghetti squash:

There are multiple ways to do it. I prefer the quick method, which is to wash and halve a small to medium spaghetti squash, scoop out the seeds and pulp, add a few tablespoons of water to the cavity in each half, place halves on a plate / microwave-safe baking dish, add another tablespoon or so of water to the plate / baking dish, and microwave on high for about 20 minutes. You'll be able to tell when it's done by drawing a fork along the inside of the squash - if it comes off in spaghetti-like shreds, it's done! Carefully remove from the microwave, drain any remaining water, and use a fork to scrape the flesh of the squash out. I usually wear an oven mitt on one hand, hold the squash, and scrape the flesh into a bowl with the other hand, since I'm impatient and can't handle waiting for it to cool. The flesh can be further drained via a fine-mesh strainer or a colander lined with a clean kitchen towel or cheesecloth if it seems really watery.

lemony chicken stirfry

I went grocery shopping at a different store than usual on Saturday. The place I went had a more extensive produce department than I'm used to, so I had fun picking out some things I don't usually cook with. I also made an impulse purchase: a bag of 8 Meyer lemons for $2.99! Nevermind that I've never used a Meyer lemon in my life...I had to have them. On the back of the bag of lemons, there was a recipe for a meat marinade. I had all the other ingredients on hand anyway, and half a package of chicken thighs to use up, so things worked out nicely!

The marinade consisted of lemon juice and zest, garlic, ginger, sugar (I used agave nectar instead), salt, black pepper and olive oil. I mixed up the marinade and put my chicken thighs in it for 4 hours or so. When it was time to cook, I put the chicken thighs in a hot pan and let them brown up. Meanwhile, I sliced up a head of bok choy, a red bell pepper and half a head of cauliflower. I tossed them into a big pan with some coconut oil, toasted sesame oil and soy sauce. Once the veggies were crisp-tender, I pushed them to the sides of the pan and added a cup of water (I had no stock!) with a tablespoon of corn starch dissolved in it. I let that cook until it was thick and bubbly, then tossed my veggies in it and turned the heat off. I roughly chopped the chicken into bite-sized bits and tossed them into the veggie mixture. I spooned it over some left-over jasmine rice that I'd reheated in the microwave. Yum!

Wednesday, February 1, 2012

beef with onions, garlic, carrots and allspice


Pretty much what it says on the tin. I threw a beef chuck roast in the crock pot with a handful of baby carrots (wish I'd had more, honestly...but I ran out), half a sliced onion, three sliced cloves of garlic, some allspice, salt, pepper, a bottle of beer and a cup or so of water. I let it simmer on low all day. When it was done, the beef was literally fall-apart tender. The allspice gives the meat a nice hint of warmness. Not heat, really...but just a warm spicy note. I steamed some broccoli to go with it, which was a nice match. Yummy!

Friday, January 13, 2012

stuffed chicken breast with shallot pan sauce

On the way home tonight, whilst wracking my brain to come up with some idea for dinner, it dawned on me that we hadn't had chicken breast in a while. This is quite likely because I find chicken breast pretty freaking tasteless and therefore don't enjoy eating it or cooking it. I started thinking about how I could make chicken breast not suck so much. Clearly it needed some kind of sauce, and it might not hurt to bury a little tasty treasure in it, as well. Something to give it a salty little zip.

Something like...prosciutto. I mean, really. Is there anything that cured pork products do NOT improve?

No. The answer is no.


I took four boneless, skinless chicken breasts and cut deep pockets into them, then stuffed them each with a slice of prosciutto, about a tablespoon of chopped roasted red pepper, and about an ounce of fresh mozzarella cheese. I tied each piece of chicken around the middle with kitchen twine so that the goodies wouldn't fall out, then seared them each side, two at a time, in a hot pan with olive oil and a little butter. Once seared, they went into a 450 degree oven for about 20 minutes.

Meanwhile, back at the ranch, I decided to make some sauce! I was totally making this up as I went along, mind you. I had an idea of what I wanted it to taste like, but I wasn't exactly sure how to get there. What I ended up doing worked, so yay for that! What I did was take the pan I'd seared the chicken in and put it on medium-low heat, then added a tablespoon of sherry vinegar. I let it steam and fizzle until it was almost cooked away, then added half a cup of water (I didn't have any stock! Kitchen fail!), and scraped the good bits up off the bottom. I added a pinch of salt, a tablespoon of butter, and big shallot which I'd minced. I turned the heat down and let it all cook down for about 10 minutes, stirring every few minutes. I tasted it and lo, it was too salty! I added a little more of everything else - water, butter and vinegar, and let it cook for a few more minutes, then tasted again. And lo, it was TASTY! Wicked tasty, in fact. The chicken was done at that point, so I plated it and then added the lovely chicken juices from the baking pan into the sauce as well. I spooned a little of the sauce over each piece of chicken and served it with roasted cauliflower and spring greens with balsamic vinaigrette.

Also, a note about roasted cauliflower: I love it. Even if you're not a fan of cauliflower, you should try it. Roasting it with olive oil gives it a wonderful nutty depth of flavor. Yum!

Wednesday, January 11, 2012

steak night

We have steak pretty regularly anyway, but celebratory dinners at our house usually mean GOOD steak. This...was one of those times. I kept swinging between T-bone and ribeye before I got to the grocery store, salivating at the thought of both. Tender, juicy ribeye! Gnaw-the-meat-off-the-bone T-bone! How could I decide?!

When I got to the meat counter, I found two gorgeous ribeyes that made the decision for me. It was a total no-brainer. I brought them home, got my favorite pan ripping hot with some olive oil in it, and started them searing. Meanwhile, there was some asparagus that needed tending to. Once the woody ends were broken off, the asparagus spears went onto a foil-lined baking sheet with a bit of olive oil and a good dose of sea salt. I gave them a roll around the pan to coat, then popped the pan into a 400 degree oven. By the time I got the asparagus in the oven, the steak was ready to flip over (I sear for 3 minutes per side, usually).

Once the steaks were seared on both sides, I put them on another baking sheet in the oven and gave the asparagus pan a shake. To the pan I'd cooked the meat in, I added a sliced onion and some sliced white mushrooms. While everything continued to cook, I made up a vinaigrette of olive oil, white wine vinegar, some Irish stout mustard and a little salt. I tossed some mixed greens in the vinaigrette and plated the salad, then pulled one steak and the asparagus after about 3 minutes (I prefer my steak rare). I left the second steak in the oven for another 3 minutes (my husband likes his steak medium), then pulled it out and let it rest for a few minutes more while the onions and mushrooms finished cooking.

Everything eventually made it onto the plate, and it looked like this:


Ribeye is, generally speaking, well worth the extra money it costs, at least in my opinion. It's flavorful, tender, juicy, and just plain GOOD. These steaks needed no dressing or sauce of any kind. They were just pure, unadulterated beefiness. I wish I had another one for dessert. ;)