Showing posts with label low-carb. Show all posts

Sunday, July 12, 2015

WTF do I do with this: garlic scape edition

First, we probably need to address the question of "WTF is a garlic scape". Garlic scapes look like this:

Oooh, snakey! 

They're the stems that a bulb of garlic sends up out of the dirt as it grows. If they were left alone, they would eventually flower and die off, but of course we don't leave them alone because: HUMANS. Instead, we cut them off before they have a chance to flower because, let's face it, pushing up stems and making flowers is hard fucking work and takes a lot of energy. Energy that could instead be used to grow nice fat cloves of garlic underground! The garlic bulb will still grow if you don't whack off the scapes (ooh, phrasing...), but it will be a lot smaller and not as tasty, so that's not how we do it. OFF WITH YER SCAPES!

By the way, see those weird bulbous lighter-green things part-way up the scapes? Those are actually the beginnings of the flowers. They look like this inside:

It looks like one of those tree people spirit things at the end of The Dark Crystal. Kind of. If you squint. And are me.

You know...just in case you wondered.

Anyway.

So, in a not so shocking turn of events, garlic scapes taste...garlicky. They're not as pungent as garlic cloves, but they're still pretty damn garlicky and you can use them in place of cloves of garlic for just about anything - stir-fry, salads, sauces - just remember that because they're not as strong as regular garlic, it will take more of them to achieve an equivalent level of garlicky-ness. You can also grill them, pickle them, use them to keep vampires away (note: theory not tested, I cannot be held liable for any vampire related damage you may sustain)...all kinds of fun stuff.

One of the most popular ways to use garlic scapes is to make pesto. I like regular basil pesto, so I figured hey, why not, let's try garlic scape pesto. I took some pictures during the process so you can laugh at my ineptitude. I'm kind like that.

The first thing you have to do is wash and trim the scapes. I actually forgot to wash mine because I'm a bonehead, so if I die of dysentery or something later on tonight you'll know why. Anyway - so once you've theoretically washed the scapes, you want to trim off just below the bulbous flower bud part (which is technically edible but pretty stringy) and also a little bit at the other end if it seems dried out. My scapes sat in the fridge in a plastic bag for over a week with very little deterioration whatsoever, but conventional internet wisdom seems to be that you should use them within a week as they will start to go mushy and lose their flavor.

So curly and fun.

Next, you want to chop them. They're eventually going to go into your food processor or blender so you can probably get away with just a rough chop, but if you know your food-pro struggles with bigger pieces, obviously cut them smaller.

Now they just kind of look like green beans.
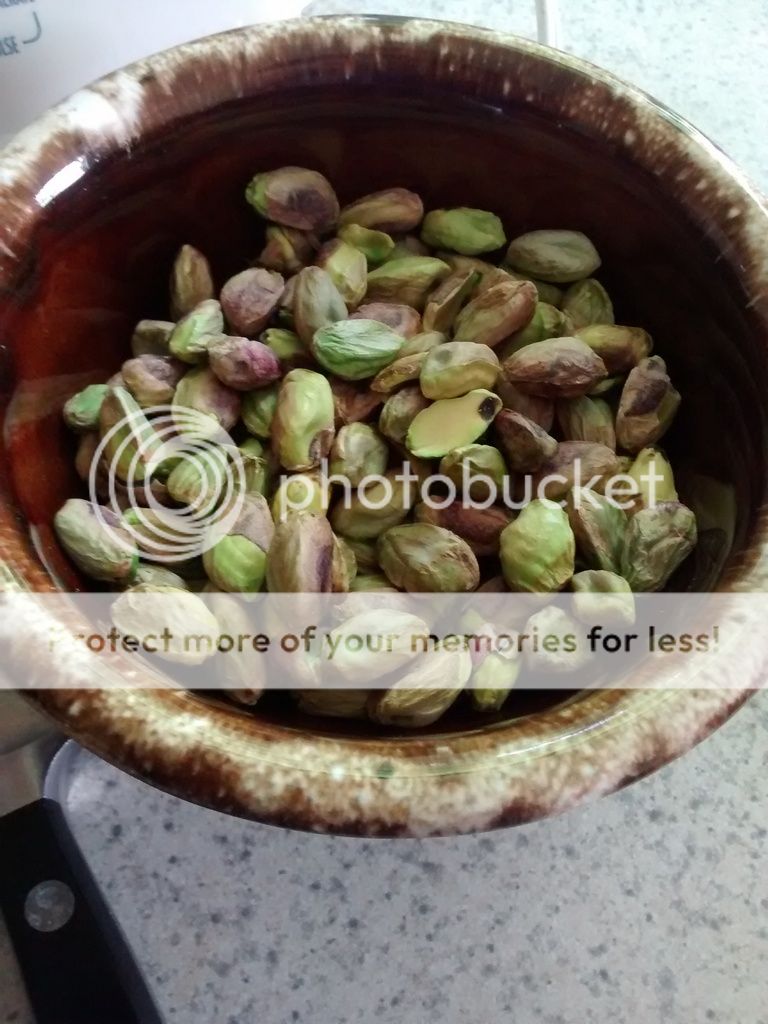
At this point, it's time to start gathering other shit you need for pesto-making. I don't know about you, but I can't damn well afford pine nuts these days, so I said screw it and decided to use pistachios instead. Yes, they're a pain in the ass if you can't find (or afford) shelled ones, but sacrifices must be made. I actually ended up liking the taste of the pistachios in the pesto MORE than pine nuts, for what it's worth. Pistachio companies, feel free to sponsor me if you're reading this!

I have never wished for stronger thumbnails so hard in my life as I did for the 20 minutes these took me to shell.

You're also going to need Parmesan cheese (if you like it, anyway - feel free to omit or substitute), extra virgin olive oil (this is where extra virgin really matters - use the good stuff!), and some kosher or sea salt.

Oh, and a food processor or blender. Or a mortar and pestle if you're hardcore, in which case I bow to not only your commitment, but your forearm strength as well.

I can't really wring too many fun-to-caption steps out of pesto making, folks. You just dump everything except the oil into the food-pro and let fly until it's all ground up, then slowly add the oil in, either while the food-pro is running, or you can stop it every couple seconds and drizzle more oil in. Fun fact: I actually started out dumping everything into my blender, thinking that it was going to do a better job of grinding everything up, but had to make a mid-course correction and switch to the food-pro when I still had inch-long pieces of scape knocking around after three solid minutes of blending. I am much more willing to do things like that now that I have a dishwasher. Weird how that works.

Anyway, you'll eventually end up with something that looks like pesto:
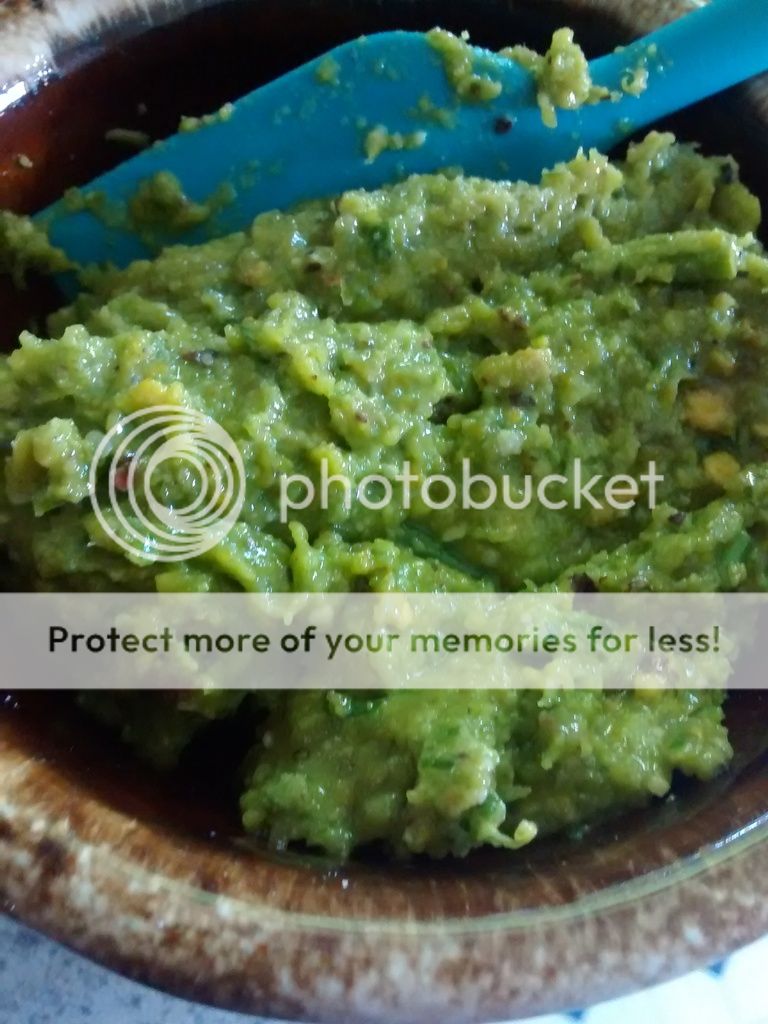
So green. Very garlic. Wow.


I won't lie...it's not like basil pesto. It's definitely good in that garlicky nutty cheesy fatty way and I wouldn't kick it out of bed, but don't go into this thinking it's going to be the same as the basil version because it will make you sad and I don't want you to be sad.

The four zucchini that I got in this week's CSA share were pretty much guaranteed to be made into zoodles eventually so I figured, why not toss them with some of my newly-made scape pesto?

Things got a little juicy. Ohh, err.

The white part is cod filet that I baked for 15 minutes at 325 degrees. Don't knock the pesto-fish combination until you've tried it - it's actually really tasty.


Here's a recipe for the pesto with actual measurements, if that's how you roll:

Garlic Scape Pesto

10-12 trimmed and chopped garlic scapes
1/3 cup grated Parmesan cheese
1/3 cup extra virgin olive oil
1/3 cup shelled UNSALTED pistachios
kosher or sea salt and pepper to taste

- Put everything into a food processor except the olive oil. Process until uniformly ground up. Slowly add olive oil a little at a time, processing until incorporated. BOOM. Done.


Monday, November 5, 2012

green meatloaf

We are fans of meat in this house, as I'm sure you've noticed. I'm always interested in finding new and interesting flavor combinations for meatloaf, especially ones that don't require bread crumbs. I've often had good luck using minced mushrooms in place of bread crumbs in my meatloaf mix, and a recipe I recently found on NomNomPaleo incorporating spinach looked really tasty so I figured I'd give it a try.

The problem with me and recipes, however, is that I tend to find them and think "oh boy that looks good, I'll try that!" and then proceed to basically not follow said recipe at all. It kind of sits there off to the side, looking forlornly up at me and trying to catch my attention as I go totally off the rails, usually in the opposite direction. Fortunately, I tend to end up with things that taste good none the less.


So, having made that point, I will tell you the details of my loaf:

I finely chopped three ribs of celery. three smallish carrots, and about a dozen small button mushrooms, and sauteed them with three chopped slices of bacon until the veggies were soft and the mushrooms had released their liquid. Meanwhile, I microwaved a package of frozen spinach until it was thawed but not super hot. I dumped it into a strainer and let it drain, and put about a pound and a half of ground beef into a big bowl. I added onion powder (I didn't have any fresh onions on hand, which is crazy, I know) and garlic powder, some thyme, some chopped parsley, salt, black pepper, and ground mustard. I cracked in a couple eggs, then added the sauteed veg mix and the well-drained spinach that I had squeezed as much liquid as possible out of. I squished it all together with my hands (my favorite part!), formed it into a loaf, and set it on a rack fit inside a lipped cookie sheet. I took a few extra strips of bacon and carefully laid them across the loaf, smoothing them down to wrap the meatloaf. It went into a 350 degree oven for about an hour - I pulled it when the internal temp hit 150 and let it rest for 10 minutes before serving.

Loaf of meat wrapped in bacon? Don't mind if I do!


For a side-dish I did roasted butternut squash, which is super simple. I used to HATE squash of all descriptions because the only way my mom ever made it was pureed and the texture just gagged me (sorry, Mom). When I discovered that many winter squashes could be roasted and would get a little crispy on the outside but stay soft and fluffy on the inside, I was a happy camper. Butternut squash is a good candidate for this treatment - you just have to make sure that a) you toss it in plenty of oil before it goes in the oven and b) you cook it long enough at a hot enough temperature. I did mine on the bottom rack of the oven at 450 degrees for about 35 minutes, flipping all the chunks about halfway through, and it came out perfectly - nice and crisp on the outside, soft inside. I actually dusted the squash with cumin before roasting, which was good, but next time I think I might use garam masala or regular curry powder, even.

Tasty, veggie-laden meatloaf
The addition of the spinach to the meatloaf didn't really effect the taste at all, but it did add extra nutritional goodness. As you can see from the picture, I could have diced my carrots a bit more tidily and smaller, but it tasted good, chunky carrots and all.

Sunday, September 30, 2012

clam chowder...sorta

Your basic New England clam chowder is typically made with clams (obviously) and clam juice, salt pork or bacon, celery and potato, some milk, and a roux to thicken it. Since we're gluten-free, thickening with a roux wasn't going to work, and since we try to eat low-carb, loading the chowder up with potatoes wasn't going to work either. I wondered to myself if I could somehow thicken the soup with cauliflower, since it's fairly bland on its own. I've had good luck subbing cauliflower for potatoes, rice, sometimes even pasta ( in the case of my not-mac and cheese). Maybe if I roasted it and then used a stick blender to puree it, I could add it to the soup to give it some body.

I started with chopping a head and a half of cauliflower roughly and then tossing it in olive oil. I added a couple cloves of garlic sliced up, and it went into the oven at 450 for about 30 minutes. In a big pot, I browned some chopped-up bacon, then added some shallots, celery and leeks. I let this all cook down until the vegetables were soft, then added the cauliflower, and some low-sodium chicken stock. I used the stick blender to whiz it all up in the pot, and to my delight, the cauliflower did just what I had hoped it would. It turned into a silky puree that added a wonderful thickness to the soup. With that sorted, I added my seafood.

Now...don't flip out on me, here. I used canned clams. I KNOW. Deep breaths, it's going to be ok. I know that fresh clams would have tasted better and had better texture, but given that I wasn't sure if the cauliflower part was going to work the way I wanted to or not, you can hopefully understand why I didn't want to invest the time and money into getting and prepping fresh clams.

So - into the pot went three cans of clams and their juice, plus some more bottled clam juice. I added a splash of sherry (because, as my ever-wise mother-in-law would say, sherry makes everything better), a couple pinches of sea salt, and about 3/4 of a cup of cream. Because I now subscribe to the "one can never eat too much fish" school of thought, I also added in a pound of cod, cut into bite-sized pieces. I let the whole thing simmer for 10 minutes until the cod was cooked through, then scooped it into some bowls and added a little chopped bacon to the top for crunchy goodness.

Chowdah!
This could have easily gone without the cream, I think. The cream was basically just gilding the lily. Next time I might use half-and-half instead, or even just milk. The cream certainly didn't make it taste bad at all, but it was pretty rich, and we don't really need all that dairy. All in all, though...I was quite happy with how this turned out (aside from the fact that the bacon sunk down into it before I could take a picture).

Sunday, September 16, 2012

how to get your husband to eat seaweed

I've had a bag of dried wakame (seaweed) sitting on my counter for a couple weeks. I bought it because I wanted to start incorporating it into our diet, but I wasn't really sure how. Tonight, as I was roasting some cod and sweet potatoes, I decided to reconstitute a little of the wakame in water to see what it tasted like. When it rehydrated, I realized that it was quite similar in look and texture to kale. It mostly just tasted a little salty. I wondered if I could combine it with kale, saute it with some bacon and onions, and get my husband to eat it. Lo and behold, bacon conquers all and my semi-evil plan worked! Mark didn't say a word about the seaweed as he was eating it, and when I pointed it out afterward, he said that hiding it with bacon was definitely a good idea.

Can YOU spot the seaweed in this picture?!
I know the sweet potatoes look burnt, but they weren't, actually...they were nicely caramelized. I could have done with shaking the pan with a little more frequency for more even browning, though.

The green stuff atop the cod is from this recipe on Nom Nom Paleo (who I love with the firey passion of a thousand suns. Was that weird? Who cares, it's true). It's olive oil infused with anchovies, capers, crushed red pepper, lemon juice and parsley. It was good, but I wish I'd have thought to halve the recipe before I started making it, because it made a lot more than I needed.

So, that's ONE way I can get my husband to eat seaweed, at least!


breakfast of champions

One of my favorite things to have for breakfast is sauteed kale with runny-yolked eggs on top and a drizzle of Sriracha.

Mmmm, buddy.

Friday, August 31, 2012

stuffed pork roast

My original aim last night was to stuff some pork chops, but I couldn't find any pork chops thick enough. I considered trying to take two thinner chops, putting some stuffing between them and then tying them together with cooking twine, but that sounded like a lot of work. Instead, I spotted a boneless pork roast that looked big enough for me to split down the middle and stuff. I was pretty sure that was going to be less work, so I was sold.

The stuffing was simple - chopped mushrooms, onion, parsley, garlic and a splash of sherry, cooked down until soft. While the stuffing cooked, I split the pork roast and pounded it out (gently, I swear!) between two pieces of plastic wrap until it was a relatively even thickness. I laid a few pieces of prosciutto across the inside of the roast, then spread the stuffing over it. I sprinkled some feta cheese over the whole thing and then carefully rolled the roast up as tightly as I could. I tied it closed with three pieces of string and liberally salted and peppered the whole thing. I then seared each side for a few minutes apiece in my cast-iron pan while I preheated the oven to 450 degrees. When the roast was nicely browned on the outside, I covered the whole pan with foil and popped it into the oven for about 20 minutes. Once the roast hit 140 degrees, I pulled it out and set it on a plate and let it rest for about 10 minutes, then sliced it and served it over some Parmesan-sprinkled steamed spinach. Don't worry, it looks quite a bit more pink in the picture than it actually was in real life.

Stuffed Pork Roast
This was very tasty, and relatively easy. The main issue was getting the roast pounded to a consistent thickness and making sure I didn't OVER-stuff it. Over-stuffing leads to the good stuff falling out in the pan, and that's no fun at all. Also, this is pretty cost-effective if you happen to hit a good sale on boneless pork roast like I did.

Wednesday, August 29, 2012

surf & turf with chimichurri

Chimichurri is a salsa (a sauce) originally from Argentina, and is used widely in South America on grilled meats. It consists of different things depending on the region and the cook, but the most basic version is a mixture of fresh parsley, cilantro, green onion, olive oil, vinegar, and garlic.

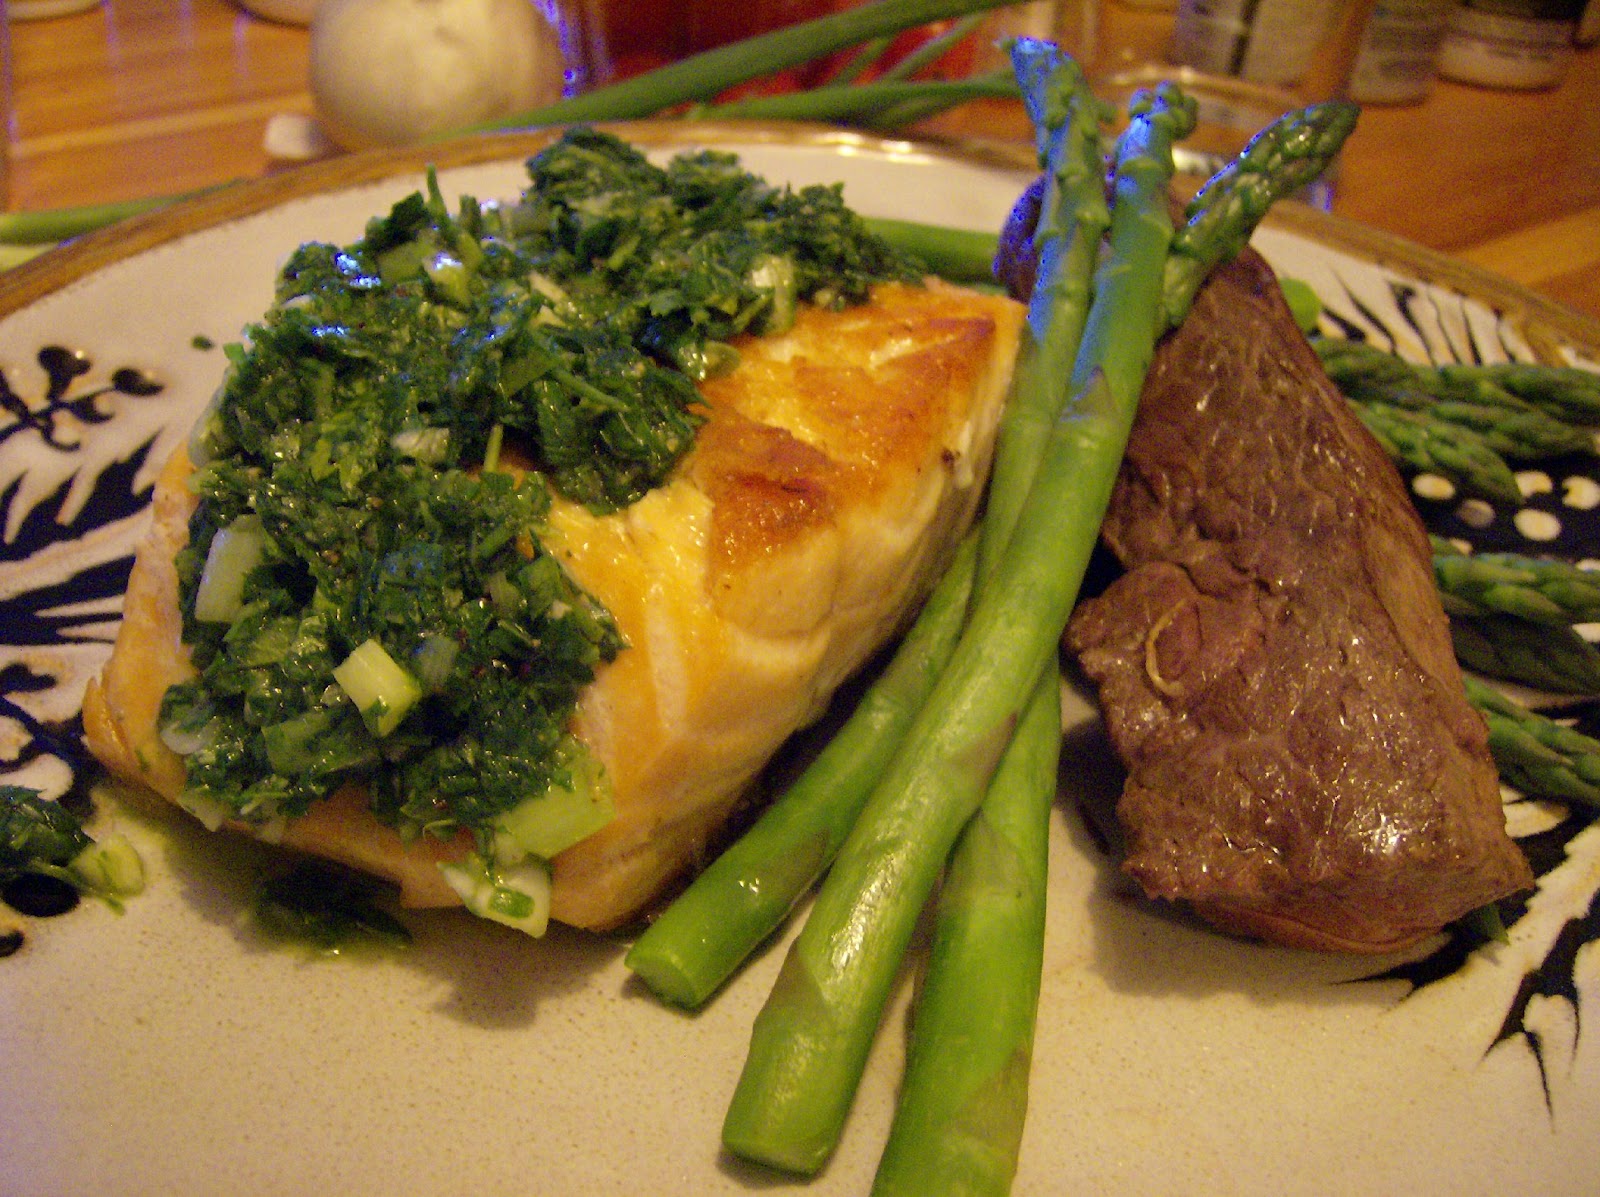
I had some salmon I wanted to cook, and some leftover sirloin steak tips from the night before, so I figured I'd try to combine them for a bit of a surf & turf. I seared the salmon in my cast iron pan in some melted bacon fat - it took about 5 minutes per side because the filets were quite thick. This was actually my first time doing salmon in the frying pan, and I'm a convert. The skin comes out so wonderfully crispy...yum! My steak tips were already cooked from the night before, so I just threw them in the still-hot pan with the fish and let them warm through.

The sauce itself is ridiculously easy....if you have a blender or food processor that works. I found out the hard way that my blender doesn't like to whiz up parsley, so I had to scoop everything out onto a chopping board and go at it the old-fashioned way with a big knife. It was good for stress relief, at the very least!

When the sauce was done, I plated everything up and spooned it over the salmon:

It was a very yummy combination. The acid and herbal brightness of the chimichurri cuts through the fattiness of the salmon very nicely Even my husband, who is not generally a fan of salmon, said he liked it and would eat it again, so we'll add this one to the repertoire. :)

Here's a quick listing of what I put in the chimichurri - you can just chuck it all in a food processor or (dependable) blender, or chop it by hand, or even mortar-and-pestle it if you want to go really old-school:

1 1/2 cups fresh parsley
1/2 cup fresh cilantro
3 green onions, chopped
2 cloves of garlic
3 tbsp extra-virgin olive oil
3 tbsp red wine vinegar
pinch of salt
pinch of black pepper

Saturday, August 25, 2012

shrimp and mussel thai red curry

My husband asked for shrimp curry for dinner the other night, but we ended up going out instead. Never one to forgo a chance to make curry, I acted on the request last night instead! Hubs likes shrimp, he likes curry, but he'd never had mussels (or any shellfish at all, it seems - no clams, no oysters...bwuh?!). I had been wanting to do some curried mussels for a while anyway, so I made him a deal - I'd make the shrimp curry and cook the mussels separate and then he could try one and see if he liked them. If he did, I'd add them into the curry. If not, well...more mussels for me.

The thing I DIDN'T tell him (sorry sweetie, if you're reading this) was that he was going to get a dose of mussel goodness either way, because my plan was to steam the mussels and then use the steaming liquid as the base for my curry. I sauteed some shallot and garlic in a big pot in some coconut oil while I cleaned and de-bearded the mussels, then added some white wine and some water (I had less wine than I'd thought...a common problem at my house. Ahem.) to the pot and dumped the mussels in. They steamed for about 5 minutes while I shelled my defrosted shrimp. I then scooped the mussels out, ate a few because I can't help myself, and set the bowl aside. I checked to make sure the cooking liquid didn't need to be strained, but this batch of mussels was very clean and not gritty in the least. I added a can of coconut milk, a couple tablespoons of red curry paste, a few good sloshes of fish sauce and a little more water, then mixed it all up well. I had pre-cooked some cauliflower by steaming it in the microwave for a few minutes (because Impatience is my middle name and I didn't want to dick around waiting for the cauliflower to soften in the broth, which takes like 20 minutes), so I threw that into the pot, added some sliced mushrooms, and turned the heat up to get a good simmer going. Once the liquid was simmering, in went the shrimp. Because shrimp cook so quickly, I actually shut the heat right off as soon as I added them into the pot...there was more than enough retained heat to cook them through.

It was then make-or-break time. I took a spoonful of the curry broth, placed a nice fat mussel on it, and took it over to my husband. He looked at it a bit warily, and which point I said, "you said you would try it!". He gave a bit of a resigned sigh and popped it into his mouth. He declared it "ok". I asked if he wanted some of the mussels in his bowl of curry, and he said "sure, if you de-shell them for me". So, I took a few minutes to shuck the mussels out of their shells, threw them into the pot, gave everything a good stir, and we were ready to eat:

Thai red curry shrimp and mussels
I had to go a little easy on the curry paste because this batch seemed quite a lot hotter than the last few batches I've gotten, and Hubs can't do really spicy food. So that's why the sauce is pretty light-colored. Also, I forgot the basil AGAIN. I don't know what it is with me forgetting basil, but pretty much anything I make that requires it ends up with me trudging back to the store to get it because I've forgotten it. Or just skipping it, in last night's case.

This was pretty yummy, but a little too coconut-tastic for me this time. Next time, I want to try the shrimp and mussels together in a tomato-based tikka masala type sauce.

Wednesday, August 8, 2012

roasted cod with olive tomato tapenade

I've made this Eating Well recipe a few times, and it's fantastic. Fish and tapenade might sound like sort of an odd combination at first, but cod can certainly stand up to the strong flavors of olive and capers. The original recipe suggested orzo and sauteed spinach to serve with it. As orzo is just pasta, I skip that part. I serve the fish and tapenade on a bed of steamed spinach and it works very well.

Definitely give this recipe a try!


Friday, July 27, 2012

kale and seafood soup

The funny thing about this is that I did everything completely wrong and backwards, but in the end it tasted pretty good. I actually started by steaming some mussels in white wine and butter with onion and garlic. When they were done, I removed them from the liquid and then used the cooking liquid as the base for the soup. I chopped up some linguica sausage and added it, along with some chicken stock. I chopped up some kale pretty finely and added that, then let it cook for 5-7 minutes. In went some shrimp and some chopped-up cod, a splash of sherry and a little salt and pepper. I let it cook for about 5 more minutes, until the fish was cooked through.


Wait, you're saying...what happened to the mussels? Funny thing about that, actually. I kept picking at them as I was cooking everything else, because they were sitting right there in front of me and I was hungry. By the time I got to the end of the soup-making, they were gone. It's ok, though...they gave the stock plenty of their tasty goodness, and they made an excellent snack!


Sunday, July 8, 2012

mussels

I had a hankering for mussels, and there were some nice-looking ones at the grocery store tonight. I brought them home, trimmed the "beards" off, gave them a good bath and scrub in cold water, and then set them to steam in a bit of chardonnay laced with olive oil and garlic. When the mussels were done (about 8 minutes), I scooped them out with a slotted spoon and set them aside while I reduced the cooking liquid and then added some butter and black pepper to it. I ran the sauce through a strainer into a little bowl, then sat back and happily nommed on mussels dipped in butter sauce. If you were a pasta person, you could pick all the mussels out of the shells and toss them with the sauce in some linguine...but I liked them just fine plain, with a nice cold beer. The only thing better would have been eating them on the beach up in Maine with my toes in the sand.

Maine wild-caught mussels with butter sauce