Sunday, July 12, 2015

WTF do I do with this: garlic scape edition

First, we probably need to address the question of "WTF is a garlic scape". Garlic scapes look like this:

Oooh, snakey! 

They're the stems that a bulb of garlic sends up out of the dirt as it grows. If they were left alone, they would eventually flower and die off, but of course we don't leave them alone because: HUMANS. Instead, we cut them off before they have a chance to flower because, let's face it, pushing up stems and making flowers is hard fucking work and takes a lot of energy. Energy that could instead be used to grow nice fat cloves of garlic underground! The garlic bulb will still grow if you don't whack off the scapes (ooh, phrasing...), but it will be a lot smaller and not as tasty, so that's not how we do it. OFF WITH YER SCAPES!

By the way, see those weird bulbous lighter-green things part-way up the scapes? Those are actually the beginnings of the flowers. They look like this inside:

It looks like one of those tree people spirit things at the end of The Dark Crystal. Kind of. If you squint. And are me.

You know...just in case you wondered.

Anyway.

So, in a not so shocking turn of events, garlic scapes taste...garlicky. They're not as pungent as garlic cloves, but they're still pretty damn garlicky and you can use them in place of cloves of garlic for just about anything - stir-fry, salads, sauces - just remember that because they're not as strong as regular garlic, it will take more of them to achieve an equivalent level of garlicky-ness. You can also grill them, pickle them, use them to keep vampires away (note: theory not tested, I cannot be held liable for any vampire related damage you may sustain)...all kinds of fun stuff.

One of the most popular ways to use garlic scapes is to make pesto. I like regular basil pesto, so I figured hey, why not, let's try garlic scape pesto. I took some pictures during the process so you can laugh at my ineptitude. I'm kind like that.

The first thing you have to do is wash and trim the scapes. I actually forgot to wash mine because I'm a bonehead, so if I die of dysentery or something later on tonight you'll know why. Anyway - so once you've theoretically washed the scapes, you want to trim off just below the bulbous flower bud part (which is technically edible but pretty stringy) and also a little bit at the other end if it seems dried out. My scapes sat in the fridge in a plastic bag for over a week with very little deterioration whatsoever, but conventional internet wisdom seems to be that you should use them within a week as they will start to go mushy and lose their flavor.

So curly and fun.

Next, you want to chop them. They're eventually going to go into your food processor or blender so you can probably get away with just a rough chop, but if you know your food-pro struggles with bigger pieces, obviously cut them smaller.

Now they just kind of look like green beans.
At this point, it's time to start gathering other shit you need for pesto-making. I don't know about you, but I can't damn well afford pine nuts these days, so I said screw it and decided to use pistachios instead. Yes, they're a pain in the ass if you can't find (or afford) shelled ones, but sacrifices must be made. I actually ended up liking the taste of the pistachios in the pesto MORE than pine nuts, for what it's worth. Pistachio companies, feel free to sponsor me if you're reading this!

I have never wished for stronger thumbnails so hard in my life as I did for the 20 minutes these took me to shell.

You're also going to need Parmesan cheese (if you like it, anyway - feel free to omit or substitute), extra virgin olive oil (this is where extra virgin really matters - use the good stuff!), and some kosher or sea salt.

Oh, and a food processor or blender. Or a mortar and pestle if you're hardcore, in which case I bow to not only your commitment, but your forearm strength as well.

I can't really wring too many fun-to-caption steps out of pesto making, folks. You just dump everything except the oil into the food-pro and let fly until it's all ground up, then slowly add the oil in, either while the food-pro is running, or you can stop it every couple seconds and drizzle more oil in. Fun fact: I actually started out dumping everything into my blender, thinking that it was going to do a better job of grinding everything up, but had to make a mid-course correction and switch to the food-pro when I still had inch-long pieces of scape knocking around after three solid minutes of blending. I am much more willing to do things like that now that I have a dishwasher. Weird how that works.

Anyway, you'll eventually end up with something that looks like pesto:

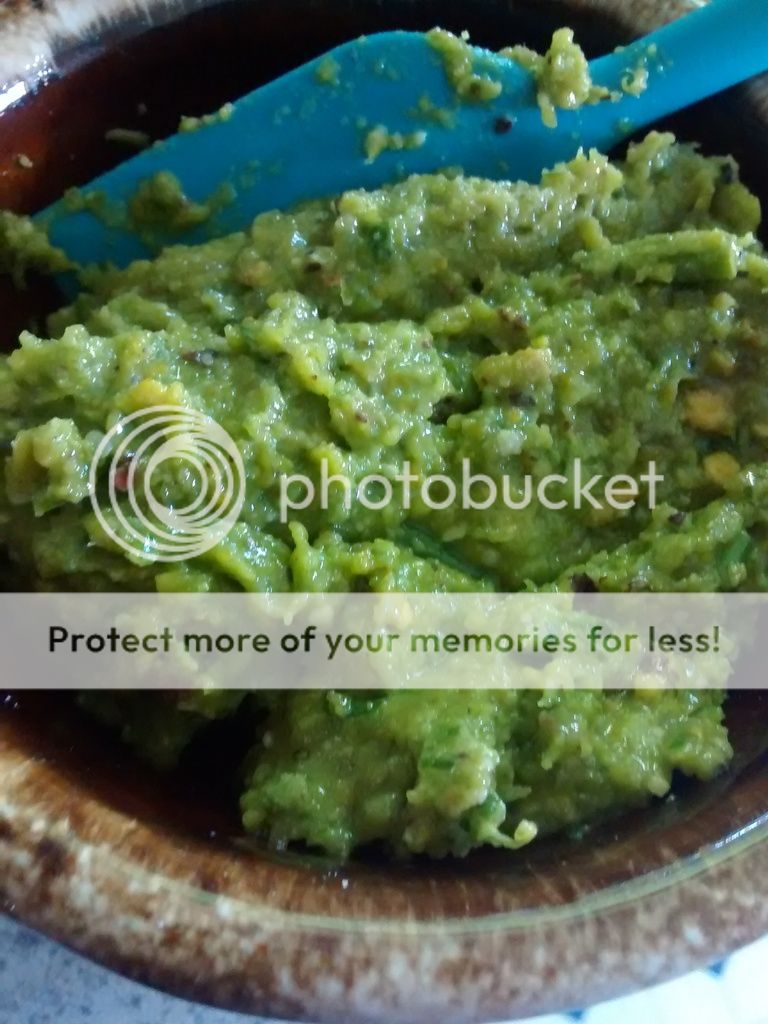
So green. Very garlic. Wow.


I won't lie...it's not like basil pesto. It's definitely good in that garlicky nutty cheesy fatty way and I wouldn't kick it out of bed, but don't go into this thinking it's going to be the same as the basil version because it will make you sad and I don't want you to be sad.

The four zucchini that I got in this week's CSA share were pretty much guaranteed to be made into zoodles eventually so I figured, why not toss them with some of my newly-made scape pesto?

Things got a little juicy. Ohh, err.

The white part is cod filet that I baked for 15 minutes at 325 degrees. Don't knock the pesto-fish combination until you've tried it - it's actually really tasty.


Here's a recipe for the pesto with actual measurements, if that's how you roll:

Garlic Scape Pesto

10-12 trimmed and chopped garlic scapes
1/3 cup grated Parmesan cheese
1/3 cup extra virgin olive oil
1/3 cup shelled UNSALTED pistachios
kosher or sea salt and pepper to taste

- Put everything into a food processor except the olive oil. Process until uniformly ground up. Slowly add olive oil a little at a time, processing until incorporated. BOOM. Done.


Saturday, June 27, 2015

WTF do I do with this: kohlrabi edition

Friends, I am back! We've had a very busy spring around Chez One Girl - moving apartments is some majorly time-consuming shit. Thankfully, we're all settled into the new Chez O.G. now and really enjoying it. We're in a very pretty spot with lots of nice quiet road for walking the our small canine overlord, plus there's woods and a brook in our back yard so I can go out and get my hippy Earth Mama thing on if I want...assuming I douse myself with plenty of bug spray, anyway. I'm just never going to be crunchy enough to be ok with bugs, and that's all there is to it. Fuck bugs. Not even sorry.

Anywho.

So, one of the super exciting things in my little world this spring has been participating in my first-ever CSA program! We live in rural Vermont and there are lots of farm stands around, but I liked the idea of a CSA in terms of basically being forced to use new and different veggies every week, rather than just going to the farmer's market and buying the same thing week after week. I looked into a few different local CSA options and ended up deciding to go with Root 5 Farm - partially because they offer a pay-by-the-month option (which is way easier for me than coming up with a big wedge of money all in one go), and partially because they're the closest farm to us - they're literally three driveways up from the house I grew up in, and just a couple miles from where we live now. In other words, they're as local as it gets!

We're a month into the CSA now and I'm a total convert. I love, love, love it. We've had everything from purple potatoes to a giant bag of storage carrots to arugula, pea shoots, dill, scallions, lettuces, chard, plus all kinds of other stuff...and it's only June! We get a weekly share until December! By the time the CSA is done, I'm going to be SO fucking spoiled veg-wise. I'm totally going to spend all winter grumbling about the sucky produce at the local grocery store, I know it.

In last week's and this week's share, there was an extra special happy-making prize that made me dance with glee: kohlrabi. Kohlrabi is a totally weird looking cat:

This is not my picture. Credit to www.georgeweigel.net

You can't quite see in the picture because it's kind of mounded up with dirt, but there's a stalk down at the bottom that the kohlrabi grows on, and it grows up into these weird purple or green balls with crazy random leaves shooting up from them. It's a brassica, related to broccoli, kale, etc, but it usually tastes much milder. It also has a long shelf-life - once the greens are removed, the bulb will easily keep in your crisper drawer for a couple of weeks. It will actually keep much longer, but the longer it's stored, the more tendency it has to get kind of woody and dried out.

Kohlrabi looks pretty intimidating but seriously, friends...it's well worth your time. It's very versatile - you can do everything from grate it and make it into fritters, to cube it up and roast it, to throw it into curry, to just eat it raw. It's also a great two-fer veggie, because the greens are just as edible as the bulb. It's also packed with vitamin C, B6, and potassium, along with the cancer-preventing indoles that brassicas are known for.

One of my favorite ways to prepare kohlrabi is to grill it. Seeing as how Mom and Pop O.G. were so kind as to give me and Hubs a brand spankin' new grill as a housewarming gift, I thought perhaps I'd make y'all a little photo odyssey of how I prep and grill kohlrabi.

So, here goes!

First things first: you're going to need a good sharp paring knife. Cut off the greens right up where the leaves start. You can throw them away if you want, but you'd be wasting a good thing, believe me. If you want to keep them and deal with them another day, all you have to do is stash them in a ziplock bag with a damp paper towel. They'll easily keep at least a week.

Once you've cut the leaves off, you'll want to cut the stems off as close to the bulb as possible. If you pull down on the stems, you can sometimes partially peel the bulb. Once you've cut the stems off, you'll have something like this:

Sorry for the blurry. Sometimes my phone pictures come out great, sometimes...not so much.  
Peeling the bulb is the most complicated part of dealing with kohlrabi...and it's seriously not that complicated. The bulb has a thin outer skin (the purple or green layer), and then a thin kind of woody layer under that:

See how right under the purple layer there's a striated layer that kind of looks like an onion layer? That needs to go.
You'll be able to see the woody layer under the skin, and you can just pare it right off. For that matter, you CAN just leave it on there...it's not going to do anything terrible to you. It's just not a texture most people really dig. But hey...I don't judge.

Once you've peeled your kohlrabi, you'll have juicy white balls (yes I do that on purpose. I am secretly 12), all ready for cooking. At this point you want to slice them up - I do mine about a quarter inch thick, give or take. I usually lose at least a slice or two to snacking during the slicing process as well:

Maybe she's born with it. Maybe it's ADHD! It's...it's definitely ADHD...

Now, you may have noticed at the start that I had one big kohlrabi, and one little one. The little one was like golf ball sized, so the slices of that one were going to be too small to try and cook directly on the grill (for me, anyway. I'm not super dexterous with the tongs. Or anything else for that matter, really). For these smaller slices, I decided to cook them in a foil packet on the grill instead. I just drizzled the slices with a little olive oil, added a little kosher salt, and folded the foil over to make a packet. Heavy-duty foil works better for this, but I didn't have any, so I chanced it with regular and no harm befell me OR the kohlrabi.

Here's my packet, along with the oiled and salted slices of the bigger bulb on the grill, plus bonus pork chops, which I flipped after about five minutes over medium heat:

Inch-thick pork chops for the win!


It's hard to see it there, but the foil packet is puffed up with steam from the kohlrabi cooking, which is a good thing. Also, my crappy phone picture doesn't do the browning on the slices justice. They were less black-on-white and more golden-brown-delicious, trust me.

The kohlrabi is done when it's tender. The longer you cook it, the more tender it will get - you can actually cook it to the point where you can mash it, if you so desire...but that wasn't what I was going for this time. I ended up cooking mine for about 8 minutes total, and that was plenty for both the slices in the packet and the ones directly on the grill.

The ones in the packet looked like this when they were done:


While I let my grilled chops rest, I steam-sauteed the rinsed and chopped kohlrabi leaves (along with a handful of salad turnip greens I had hanging around) with some grated garlic. Keep in mind that the bigger the leaves, the tougher the center stem will be and the longer it will take to break down during cooking. If you're planning on a quick cooking method like steaming or sauteeing, you probably want to slice the center stems out beforehand, like you'd do with collards or kale. Also, don't forget to salt your greens. Please, oh please. It makes a world of difference taste-wise.

Here's my finished plate:

I know this post is about kohlrabi, but come on. Look how sexy that pork chop is. Unf.

So, there you go - two ways to grill kohlrabi, and plenty of reasons why you shouldn't be skeered of it even though it kind of looks like some sort of alien kale hybrid thing. Trying new things is fun! Don't be intimidated by vegetables that look like they're going to be a lot of work to prepare - most of the time they're not nearly as much of an ass-ache as you're imagining them to be, and who knows what kind of deliciousness you might be missing just in the name of being lazy!

As always, feel free to comment or email any questions, and you can also find me on Facebook and Instagram (warning: the Instagram is my personal account and also has lots of nerdy selfies, crafting pictures, and pictures of the tiny canine overlord). I'd love to hear from you about your kohlrabi experiences, what your favorite weird-looking veggies are, what types of things you like to grill, what your favorite color is...talk to me!


Tuesday, March 17, 2015

carnitas

Carnitas are, essentially, chunks of braised pork butt. As the braising liquid slowly evaporates from the pot, the fat renders out of the pork and collects in the bottom of the pot (because fat is more dense than water. SCIENCE!). Eventually the water all cooks out and you're left with succulent spiced pieces of pork that crisp up in their own fat. It takes several hours and is all very torturous in that it fills the house with amazing pork aromas long before the meat is actually ready - but I assure you, it's totally worth doing.

It looks totally unappetizing at the beginning. I posted this picture on Facebook and had people guessing it was everything from bean soup to vomit (I'm not sure about that person, honestly...but we won't go there):

Not winning any beauty contests.

The end product is much more attractive, though - well, if you're into crispy pork bits, anyway...and if you're not, you've probably come to the wrong place:

Mmm, looking better!
The carnitas are very tasty just like that, honestly. I like them with eggs for a hearty weekend breakfast, or you could easily toss some into sauteed greens for a bit of flavoring. They are excellent on top of a baked sweet potato as well.

Or, you could use them in the more traditional way. No, not rubbing them all over your naked body while you groan happily (wow, that got weird) - rather, piling them on tortillas with lots of fixings:

Winner winner, carnitas for dinner.
My favorite combination of toppings for carnitas is raw shredded cabbage and radish, because they offer a nice crunchy fresh counterpoint to the rich pork. A little bit of avocado on top makes it even more pretty and acts as a built-in dressing. I don't usually go for salsa on carnitas because they already have a lot of acid in them, but don't let that stop you if you want to try it.

Also, a note about tortillas - I use corn tortillas, and I warm them up one at a time in a ripping-hot pan so that they blister a little and get a bit black in places. You could just warm the tortillas up in the oven or microwave, but I really like the smokey note that the toasted bits of tortilla add.

Here's the recipe for the carnitas themselves:

3lbs pork butt, cut into large-ish pieces - mine are like 3" square-ish chunks, usually
1/2 cup orange juice
1/4 cup lime juice
 crushed garlic cloves to taste - I usually use 4 or 5 good sized ones
1 tsp ground cumin
1/2 tsp ground coriander
1.5 tsp salt (I use kosher salt - if you're using regular salt, adjust the amount down by 1/4 tsp or so)

Put everything in a big pot, bring it to a boil, then turn down the heat and let it simmer, uncovered, for about 2 - 2.5 hours. No stirring, no poking, no nothing. Leave it alone! After a couple hours, you can turn the heat up a little and let it cook more briskly for another 45 minutes or so. Again, don't mess with the meat at all. The water will cook out completely and the pork will start to sizzle in its own fat - this is when you want to really pay close attention. When you notice the edges starting to get crisp / brown, you can carefully start turning the pieces of pork over to crisp up on the other sides. It will be very loose and want to fall apart at this point - that's ok, just be gentle with it and don't worry if it comes apart some. As the pieces get browned and crisped to your liking, remove them to a bowl for serving. I like to aggressively scrape the bottom of the pot with a wooden spoon once all the main chunks of meat are out of it in order to make sure I'm getting up all the really crisp bits off the bottom, as well. Those are, in my opinion, the best bits!

Serve on warm tortillas with preferred toppings, or throw into any number of other dishes for happy-making porky goodness. This also freezes very well.

This recipe is gluten-free, and assuming you skip the corn tortillas, would be Paleo- and Primal-compliant.


Saturday, March 14, 2015

pork all the things - a stir-fry odyssey

This past week, boneless pork loin was on sale at the grocery store, so I bought a huge one and we've been having pork for dinner every night this week. I did pan-fried chops one night, I did a roast another night, we had the leftovers from the roast with some braised cabbage the following night, and last night I used the last of the loin to make stir-fry:


I like stir-fry, because not only is it a good way to get in plenty of vegetables and protein, but it's also a pretty high culinary pay-out for a small amount of effort. Also, anything that I can cook with the burner cranked up to high is automatically exciting in my book.

Pork loin is nice in a stir-fry because it's got a little extra fat as compared to tenderloin, so it offers more porky flavor and stays a bit more moist. I like to give mine a bath in a combination of tamari, sesame oil, honey, grated fresh ginger and a splash of water:


The meat sits in the marinade while I chop up my veggies. This is my go-to combination of broccoli, red bell pepper, onion and mushroom:


When the veg is all chopped, it's time to fry! I crank the heat up under my favorite heavy-bottomed saute pan and after a minute or so, I add some coconut oil. Once the coconut oil is melted, I throw my veg in, starting with the ones that take the most time to cook. In this case, broccoli goes in for about a minute, then I dump everything else in because the onions, peppers and mushrooms all basically cook at the same speed. I swear by tongs for stir-frying - I have a pair with silicone tips on the ends so that they don't scrape my pan up, and they're great.

The veg comes out when it's crisp-tender:


...and in goes the meat, working in batches so as not to over-crowd it and end up with steamed chewy pork bits of sadness:


The remainder of the marinade goes into the pan with the last of the pork and I let it cook down to a glaze consistency, then add all the pork back in and toss it to coat. It gets quite dark because the sugars in the honey caramelize with the soy, but that's exactly what makes it taste awesome. Don't fear the caramelization!

When the meat is cooked through, toss it on top of your dished-up veg and voila, Paleo-friendly stir-fry, no rice needed!

Friday, March 6, 2015

glazing my thighs

No, I will never tire of post-title innuendo (in YOUR end-o!). Not even sorry.

Anywho.

I've been kind of obsessed with the half-stove-top, half-oven method of cooking chicken thighs lately. It's an easy and reliable way of getting super crisp skin on the thighs without having to coat them in something like panko or cornmeal. I'll admit, it's kind of messy if you don't have a splatter shield, but even so, it's totally worth an extra wipe-down of the stove-top, in my opinion.

When I was making up my menu last weekend and saw chicken thighs on sale again, I thought to myself, "Self...why couldn't we use the stove-top-then-oven method to make some super crisp chicken thighs, then stir up a little batch of the glaze we use on chicken wings and dump it over the thighs instead? Doesn't that seem like a good idea?" It DID seem like a good idea, so I rolled with it, and this is what I ended up with:

So crispy. Much nom.


For the glaze, I used a mixture of fresh grated garlic and ginger, some tamari, some honey, toasted sesame oil, and a splash of water. I always add the water thinking that the glaze needs to be thinned out, and I always regret having added the water when I go to taste the glaze and it tastes...watered down. Welcome to my life. In retrospect, I could have reduced the glaze down in a pan to cook some of the water back out, but that sounds like a lot of work.

I started the chicken thighs out in a hot pan with a little coconut oil in it (skin-side down, duh), and let them fizzle and splatter happily for about 8 minutes until the skin was good and crispy and brown. Then I flipped the thighs over in the pan, turned off the heat, and spooned my glaze mixture over the meat. The pan then went directly into a 425 degree oven (use an oven-proof pan, friends...I will not be held responsible for you melting the handles off your pans) for about 15 minutes until the thighs read 165-170 degrees, at which point they were done. Huzzah!

The veggies were very simple: I cut up carrots, onion, radishes (I had some hanging around I wanted to use up), and two broccoli crowns, and quickly stir-fried them in a very hot pan with a little coconut oil. The broccoli was being slightly uncooperative and didn't want to cook through as fast as everything else did, so I threw a lid on the pan and let it steam for a few minutes to finish it off.

This dish is gluten-free (as long as you use tamari rather than soy sauce), and if you wanted to be super-strict Paleo you could sub the tamari for coconut aminos and get extra, uhh...dinosaur points.

Get it? Paleo? Dinosaur? Nevermind...


Monday, March 2, 2015

spice-crusted pork tenderloin

You all know of my deep and abiding love of all things pork, but I have been keeping a dirty little secret from you: I am not a fan of pork tenderloin. I love the texture of it, but similar to beef tenderloin, it has very little flavor in and of itself, and to a card-carrying meat lover, that's kind of sad-making. That, along with the fact that tenderloin is super lean and easy to over-cook have led me to just basically avoid buying it for many years.

Until this past weekend.

Sexy meat.
I found a recipe for spice-crusted pork tenderloin in a Cooks Illustrated collection of "skillet dinners". They showed medallions of rosy moist pork heavily crusted with spice and served with a sexy golden-brown potato roesti (which, for the unintiated, is basically a giant pan-fried hash brown and is one of the best things you can make with potatoes. Which is saying a lot, in my book, because I love me some potatoes). I was sold. I needed to try it. I tried to talk myself out of it, but it just wasn't working. The hook was firmly set and I surrendered to the pull.

The recipe calls for rolling the tenderloins in a mixture of spices (caraway seeds, ground coriander, nutmeg, allspice, salt and black pepper), then searing the meat off on all sides in a hot pan with a bit of melted butter. The meat then goes in a baking dish in a 425 degree oven for 12-15 minutes until it hits 140 degrees. You take the meat out at that point, tent it with foil, and let it rest until it hits 150. I ended up having to leave mine in the oven for about 22 minutes to get it to 140 degrees, but that was entirely my own fault because I didn't pull the meat out of the fridge until like 20 minutes before I wanted to cook, which is a rookie move.

Even with the added cooking time, the meat stayed super juicy and tender, though. And when I say tender, I mean like...you could cut it with the side of your fork. No knives necessary. Redonkulous. I think next time I make this, I'm going to pre-rub the meat (hurrrr) with the spice mixture and let it sit for a while before I cook it, just to see if the flavors sink in more. I suppose you could brine the tenderloin ahead of time if you were feeling really fucking ambitious about it, but a) I'm never that ambitious and b) I'd be a little worried that brining might turn the meat mushy rather than impart more flavor. I don't know. If you try it, tell me what you think.

The roesti was a little more work - I opted to shred my potatoes by hand rather than using my small and finicky food processor, so I got a good triceps workout holding the box grater at a weird angle in the bowl. You then have to rinse the excess starch off the shredded potato, then scoop it into a clean dish towel and wring as much water as you can out of it. You season the potato with salt and pepper, add a little corn starch to help bind the potato together better (there was a reason for this given in the write-up about the recipe but I was skimming so...yeah. No science today, sorry!), then plunk it all into a hot pan with some melted butter and keep squishing it down until it's a nice compact disc. It gets all GBD (golden brown delicious) on one side, then you flip it (which is a delicate operation, I tell you what), and let it get GBD on the other side. BOOM. Giant hash brown heaven. I will say, with regard to the roesti, that I should have had my heat turned up higher when I started, so it ended up kind of greasy. EVEN SO. Giant hash brown. So crunchy, much nom.


I steamed up some green beans with almonds to complete the plate. In retrospect, I could have made them more fancy with like some orange zest and cranberries, but...eh. I'm the weirdo who likes green beans even raw, so they don't need much fancying up for me to shove them in my nom-hole.

God, nom-hole sounds dirty. I'm keeping it. I love it. Heeeeee.

Anyway - this dinner is gloriously gluten-free (assuming you're doing your own due diligence on your spices). If you're going the Paleo or Primal route, you'd want to omit the corn starch and white potatoes, depending on how strict you're being.

Tuesday, February 24, 2015

take your sweet potatoes and stuff them.

The meat-department gods saw fit to put pork butt on sale this week, my friends. You know what that means: another installment in the "what do I do with all this leftover pulled pork" files! Today the answer happens to be, "Stuff it in your sweet potatoes", which sounds like not only an awesome euphemism but also a good culinary idea.

Everything is better with cheese. FACT.

Obviously, this project starts with the assumption that you have some leftover shredded pork butt. Mine was just plain, not sauced, but I'm sure that sauced-up pork would be just as delightful in this application.

You're also going to need some sweet potatoes, obvs. I used two medium-sized ones to feed myself and the Ginger Beast, and honestly, it was a lot. Next time I'd either just serve half a potato each, or use smaller potatoes.

Anyway - you can bake the sweet potatoes ahead in the oven if you're fancy, but I'm personally really fucking lazy about shit like that, so I just cut a slit in each of mine and throw them in the microwave on the "potato" setting until they're done. These two took about 12 minutes total, and I flipped them over halfway through.

Once the potatoes are cooked, split them in half and scoop out all but a little bit of the flesh from the skin (that sounds totally sinister, sorry). You want to leave a little rim around the edges so that the skins keep their general shape. The scooped-out flesh should go into a bowl big enough to mix some other stuff into. Also, side-note between you and me? This whole flesh-scooping thing is WAY fucking easier to do if you let the potato COOL DOWN a little first, says she who now sports steam-burns on her left. hand. Yes, that type of thing is probably obvious to most people, but a) I am the queen of impatient and b) I am not most people. So I'm just throwing it out there.

Where was I? Oh, yes, potato flesh in the bowl. To that, you're going to add the pulled pork. I used like two cups or so of pork because we are hungry, hungry hippos. Use less if you're on a diet or you hate the world or something. I also added a pinch of kosher salt, a shake of black pepper, a teaspoon-ish of ground cumin and a half a teaspoon-ish of ground coriander seed. Also, and this is KEY, the juice of one fresh lime. It's really good, trust me on this.

So, mix all that stuff up in the bowl until it's well-combined. At some point you should have pre-heated your oven to like 450 degrees - I should have mentioned that earlier, sorry. You also need a baking dish. Surprise! This is how my ADHD-addled brain actually works when I cook, by the way. All these recipes I post where I have measured nothing, timed nothing, and can only remember half of what I put in the pan? Welcome to my life, pumpkins. This is how I roll.

Side-tracked again, sorry. So, yes. We're stuffing the pork-mash mixture into the hollowed-out potato skins. It's probably best to do this once you've placed the skins IN the baking dish, otherwise you might end up with one falling apart, pork and sweet potato all over your floor, and the happiest dog in the history of life (assuming you have a dog. We do. He would have been ecstatic, trust me). Once you've stuffed the skins, you can sprinkle some shredded cheddar on top for extra tastiness. Put that whole mess in the oven and let it fester for...oh...I don't know, like 15 or 20 minutes? Long enough for the cheese to reach golden-brown deliciousness status. When you've achieved said crispy cheese enlightenment, BOOM...you're done. Well, the potatoes are done, anyway.

If you want to experience the delight of the side-dish as pictured, that's super simple as well. It's just a baby mixed greens blend (I like the Olivia's Organic saute blend, personally) that has been sauteed with some onion and chopped radish (JUST TRY IT, OK?! Stop making faces. I would not lead you astray. Much...). I use a dab of bacon fat as my saute medium for this, and I add the onions and radishes first to let them caramelize a little before adding the greens in, because those cook really quickly. Oh, and a pinch of kosher salt. Unsalted greens are sad greens, yo. The better your bacon fat, the better the greens will be, as well. Mmm, smokey!

AND, for anyone playing the Paleo / Primal game at home, this meal would easily be considered Paleo if you left off the cheese, and is Primal-compliant as-is. It's also gluten-free, cha-cha-cha!

Wednesday, February 4, 2015

pork chops with mushroom gravy

Mmmm. Graaaaavy.


My Nana's mushroom gravy is the gravy yardstick I measure all others by. Any time I've ever asked her how to make it, she has just smiled and said, "Well, it's just gravy with mushrooms in it". I've been trying to re-create her gravy for YEARS, and I think this is about the closest I'll ever come. It IS very simple, but it's certainly not just gravy with mushrooms in it!

I started by searing seasoned pork chops in a pan with a bit of bacon fat, about three minutes per side. I had five pretty big rib and sirloin chops to do, so the pan built up a nice fond. Once the chops were seared and set aside, I added some chopped shallot to the pan and let it soften. To that, I added some chopped cremini mushrooms. A few minutes later, I sprinkled the whole thing with a tablespoon of flour (normally we avoid gluten, but sometimes you just want old-school gravy. Don't judge.), gave it a stir, and let it cook for about a minute or so. I slowly added beef stock, stirring and scraping up the bits of good stuff from the bottom of the pan. After adding the beef stock, I added black pepper and rosemary, and let the gravy come to a boil and cook for 3-4 minutes. It needed just a pinch of salt at the end, then we were ready to eat. Sides were steamed broccoli and sweet potato mashed with butter.

Tuesday, February 3, 2015

ridiculous key-word searches, and a meatloaf dissertation

This afternoon, I made a post on Ravelry about one of the more ridiculous key-word searches that showed up on my StatCounter for this blog lately:

I have a blog, and because I am a nerdy nerdy data nerd, I use StatCounter to see how much traffic I get on my posts (when I actually post regularly, anyway. Ahem). One of the functions on StatCounter is a report that shows you recent keyword searches that people have used to get to your website. My blog is mostly cooking and food related, so there are completely reasonable things people have searched on that led to me, such as:

chicken thigh recipe
tortilla-less fajitas
pork rib roast
adding seaweed to soup
paleo meatloaf


However, today I logged in, looked at the keyword search thingy, and one came up that had me simultaneously snorting with laughter and WTF’ing:

one girl one meatloaf

Now…I know how my blog ended up in their search with this, because the blog is titled “One Girl Cooks”, and I’ve posted a lot about meatloaf. BUT STILL. I really have to wonder what the person who did a Google search on “one girl one meatloaf” was REALLY looking for. I’d like to believe that it was a single woman looking for an individual-portion meatloaf recipe maybe, buuuuuuut…yeah.

/cool story, meatloaf

The conversation quickly turned to meatloaf, of course, and at one point I was asked for my meatloaf recipe. I tried to explain that I don't really do recipes because I lack the attention span to, you know, measure things and take notes, but then I ended up writing what I am calling a stream-of-consciousness meatloaf dissertation. I thought readers might find it helpful, or at least entertaining, so here you go:


I make a few different versions - one that uses spinach for filler, one that uses minced mushrooms for filler, and my regular one that can be done with normal bread crumbs or gluten-free ones. If you want to use spinach, get frozen chopped spinach, thaw it out, squeeze as much liquid as you can out of it, and add it directly to your mix. If you want to use mushrooms, I would suggest either button mushrooms or baby bella. Mince them up very fine, toss them in a hot pan with a little fat to lubricate, a little salt, and some garlic and/or herbs if you want (thyme and rosemary are nice). Cook until mushrooms have released their liquid, then let cool for a few minutes and add to your meat mix. My bread-crumb version just involves soaking some bread crumbs (I use GF ones) in a little milk (I use almond milk, but whatevs) and adding that to the mix. I also add a beaten egg or two to my mix as a binder.

Onions, I feel, need their own paragraph, because I have FEELINGS about them. I hate big chunks of onion in meatloaf. I actually grate my onion (food processor for the win) so that it’s pulp and juice, because a) it gets the onion flavor more thoroughly incorporated, and b) you aren’t crunching on pieces of onion as you eat. Not everyone is as picky about this as I am. Do what you feel is right.

For meat, I like to use a mix of ground pork, beef and veal (at my grocery store, you can get 
“meatloaf mix”, which has all three in it). You want a mix with a fair amount of fat in, otherwise your meatloaf is going to be dry. Meatloaf is really not the time or place to be worried about calories.

Seasoning-wise, I like the afore-mentioned HP sauce immensely, but if I don’t have it on hand, I will usually spice my meatloaf with salt, pepper, a little bit of allspice, garlic, and thyme. Rosemary is good, too. Sage is good if you’re using mostly pork - gives you a kind of sausage-y flavor.

You want to cook the meatloaf until it registers 170-ish in the middle, whether you’re cooking a big one or mini ones. I say “ish”, because you can pull them at like low to mid 160’s and let carry-over cooking do the rest if you’re going to be working on sides for another 10 minutes or so…but that’s up to you, and that’s something that makes some people really twitchy.

If you’re making mini meatloaves, what I like to do is form the mini-loaves and sear the tops and bottoms in a ripping-hot pan, then transfer them to a parchment-lined cookie sheet and bake at 400 degree for about 20 minutes or so. If you’re making one big meatloaf, it’s going to take a lot longer to cook - like an hour probably, depending on how much mix you have. Even when I’m doing a big loaf, I still cook it on a cookie sheet rather than in a loaf pan, because it lets some of the grease escape and it gives the whole thing a nice crust.

You can glaze your loaf as it’s cooking (barbecue sauce is good, HP sauce is awesome, please god don’t use ketchup and ruin all your hard work), or you can get super meat-porny and lay bacon strips over the top (do them width-wise, not end to end, otherwise you end up with bacon bits when you cut into it to serve).


Sunday, November 30, 2014

pork magic

Pork is my favorite meat. Shocker, I know. There's just something about pork, though. Something delicious. I could never be a vegetarian, because pork. Any other type of meat, I could easily do without - but take my pork away and I would be a sad panda indeed.

Last weekend I did a bone-in pork rib roast slow and low, and it turned out fantastic. I didn't take any pictures of it because I wasn't in a blogging mood (doing some work getting my brain-meats sorted out lately, hence the absence), but it was good enough that I was quite happy with the idea of a repeat performance today. When I found a blade-portion roast all ready to go AND on sale at the meat counter during my shopping trip, I did a little happy dance.

 I was thinking about doing some sort of cumin-crusted application with the pork, but one of the things I managed to forget whilst shopping was, in fact, cumin. Standing in front of my spice rack, I was starting to scheme about another rub to do when it hit me - I had a tub of ras el hanout, which is cumin-based, still sitting on the shelf from a previous spice-mixing venture. Hooray! I gave the roast a good rub of the spice mix, plus a little extra sprinkle of kosher salt, then popped it into a 250 degree oven. I checked the temperature after an hour, and down by the bone it was registering 90 degrees. Definitely not done, but that was to be expected. I bumped the oven up to 275 and left it for another 45 minutes. When I came back to check it again, it was reading at 140 by the bone. I pulled the roasted, tented it with foil, then let it rest for about 35 minutes while I roasted off the veg for my side.

When I went to carve the roast, I knew I was on to a winner. It was ridiculously tender, and the little rind of fat on top of the roast had crisped up beautifully. The rich, spicy, orange-y smell of the ras el hanout combined with pork fat was fabulous. Such a good combination!

Mmm, roasty.

The veggies on the side are a combination of roasted parsnips, Brussels sprouts, shallots, and a few carrots I had hanging around that I wanted to use up. The Brussels sprouts, for the record, were ENORMOUS. The largest one was almost as big as a lightbulb, and they were all bigger than an extra large egg. I was a little worried that they'd be bitter, but they weren't at all, which was a relief. I roasted the veg very simply - I just tossed them with salt, pepper and olive oil and spread them on a cookie sheet lined with parchment paper (makes a big difference in terms of things not sticking). They went into a 425 degree oven for 30 minutes, then I stirred them a little and put them back in for another five minutes or so just to brown a little more. If you've never had parsnips, this is the way to try them, seriously. I grew up in a non-parsnip household because my mom hates them, but I've grown quite fond of them since my husband talked me into cooking some for him a few years back. Roasted parsnips have a sweetness to them - their astringency melts away and they end up mellow, almost fruity tasting. The more brown, crisp and caramelized they get, the more delicious they are.

For anyone playing along at home, this dish is not only completely gluten-free, but also Paleo- and Whole30 compliant. 


Sunday, October 5, 2014

fridge-emptying Paleo breakfast bake

I am not a morning person. That's not to say that I don't LIKE mornings, because they're actually my favorite time of day - but I do not like being expected to function in any sort of productive manner before about 10am. Trying to feed myself and my husband a decent breakfast tends to be at odds with my desire to maintain a sloth-like morning agenda.

Most mornings lately, I've been having a pumpkin smoothie for breakfast because a) it's fast and b) it fills me up. There's also some nutrition in there somewhere I'm sure - but the simple fact is, dumping things in the food processor doesn't take a whole lot of mental fortitude. That's key in the blurry pre-10am hours around here, trust me.

However, this coming week we're going to be traveling, which means two things (well, more than two, but for the purpose of this blog post, I'm saying two) :

 1. I need to use up some leftover food in the fridge, and

 2. I want to create as few dirty dishes as possible, because the less dishes I have to wash the night before going on holiday, the better.

To be fair, the less dishes I have to wash EVER, the better...but you know what I mean, I'm sure.

This breakfast bake checks both those boxes. Not only did it use up all the leftover bits in my fridge, but since I did the washing up directly after making it, it becomes very un-dish-intensive. Also, it gets bonus points for me not having to do anything TO it in the morning except put it on a plate and warm it up. BREAKFAST LAZINESS GOLD MEDAL! Literally the only thing lazier would be, like, cracking raw eggs into my mouth, which...no.

So, what I had hanging around was:

half a red bell pepper
half an onion
half a box of mushrooms
about 3/4 of a pound of pork sausage
nine eggs
one large Russet potato

Aside from the chopping involved, this could not be easier. I browned the sausage, then scooped it out to drain on paper towels while I sauteed the chopped veg in a little bit of the leftover fat. I washed the potato, poked it with a fork a few times, then stuck it in the microwave for about nine minutes. While the veg was getting soft in the pan, I cracked the eggs into a bowl and whisked them up. When the veg was read, I scooped it and the sausage into my baking dish (which I had swiped with olive oil just to ensure things wouldn't stick). When the potato was almost done, not quite cooked through, I pulled it out of the nuker, chopped it up (HOT POTATO, be careful, learn from my mistakes), tossed it with a little kosher salt and then threw it into the frying pan with the rest of the leftover pork fat. I cranked the heat up and let the potato get kind of brown and crispy in the pan, then scooped that into my veg and sausage mix. The egg got dumped over the top, dish got a little shake, then it went into a 350 degree oven for about 30 minutes.

Ta Dahs:

It's like a craggy landscape of nom.


As long as you use a sausage that doesn't have added sugar, gluten or processed weirdness, this is a Paleo- and Whole30-compliant dish. If you don't like sausage, you could use bacon, ham, ground bison, really whatever floats your canoe. There's also no saying that you have to eat it for breakfast - you could stick some in your facehole when ever...I don't judge.


Friday, September 26, 2014

brussels sprout curry, aka: colon-blow curry

Truth time. I had a pumpkin smoothie for breakfast, rather a large amount of broccoli at lunch, and then washed this curry down with a glass and a half of porter. I predict things are going to start getting musical (and fragrant) around here in about, hmmm...let's say four hours or so. The effect will of course be doubled because the Ginger Beast had the same dinner as me (and is generally far more prone to flatulence in general). So basically what I'm saying is, you're probably not going to want to visit any time in the next 8-12 hours. You have been warned.

ANYWAYYYY.

This curry was very much an on-the-fly thing. We had company coming for dinner and all I had for protein was a package of defrosted meatloaf mix (ground beef, pork and veal combination). Trying to come up with what to do with that, a box of shredded Brussels sprouts and a can of fire-roasted tomatoes (I love you, Muir Glen!)  made for an entertaining ride home, but then it occurred to me that curry could in fact be the answer to my problems. Well, some of them...possibly the root of others, but we'll cross that bridge when we come to it.

Mmm. Fiber.
Basically, this is just a standard mince curry with a few cups of shredded Brussels sprouts added when I added the tomatoes. I also used a can of coconut milk, but I only used the solidified cream from the top of the can, not the watery part. And yes, that's a little bit of rice at the bottom of the bowl there. This is the first rice I've had in...I can't even remember how long. Many months. It was just there for filler because I was feeding a non-Paleo-eating person who is accustomed to a starch with dinner. My portion size was about 1/4 cup of the rice with about a cup and a half of the curry over top.

Minus the rice, this is Paleo compliant. The glass and a half of porter I drank with it , of course, are not. Is not? NOT. Beer am good. I wonder if there's any left...

Wednesday, September 17, 2014

guacamole all the things


Sometimes the rest of your dinner has nothing to do with guacamole, but you just have to say fuck it, and make the guacamole, because it's delicious.

This was that dinner.

Look at that guacamole, hiding in the background. Sneaky.


Pretty simple - seared chuck steak, sweet potato mash, sauteed baby kale with mushrooms, and the aforementioned random guacamole.

Tuesday, September 16, 2014

How Bad Can It Go? Emergen-C

I've decided I'm going to try doing a series of food / drink experiments. I'm calling it "How Bad Can It Go" because I like to tempt fate, and because it's kind of my default mode of operation. Because I decided to do this while I was at work, and being of a very impatient constitution, I had to find something immediately accessible to use as my first experiment. That something ended up being a packet of Emergen-C that came into my possession as part of a "care package" that one of our vendors sent us all in preparation for our busy season. Yes, they send us some random stuff. I don't ask, I just squirrel the random stuff away for occasions like this.

Anyway.

So, if you're not familiar with the Emergen-C product, you can Google it, but the basic gist is that it's a powder loaded with vitamins and other good shit. It comes in a cute little .3 oz packet that you're meant to rip open, dump into 4-6oz of water, let fizz for a minute or so (the fizzing is a big selling point to me, not gonna lie), then imbibe and thus refresh your body with wonderful goodness. Or something. The packet does say that it's a dietary supplement, and it does point out that it contains "24 Nutrients with 7 B Vitamins, Antioxidants and Electrolytes", but it does not actually claim anything else, like "gives you energy", or "makes your hair curl", or "cures the common cold". Because it doesn't actually claim to DO...anything...(well, aside from fizz!), it doesn't really open itself up to a whole lot of criticism on the "does this shit really work" side of things...which is by design, I'm sure.

Since there's no way to judge the product on efficacy (because who really knows if that rush of 1000mg of vitamin C actually did anything for me or not. My vitamin C meter feels..fuller, maybe?), that leaves me with only taste to judge.

Funnily enough this, I feel, is where Emergen-C has some issues.

My packet was the "Super Orange" flavor. The ingredients include "natural orange flavor" and "orange juice powder", so I was certainly expecting something orange-y. Pouring the powder out into my cup, I got a weak waft of a Tang-like fragrance. I added about 6oz of water, and to my delight, the mixture started to fizz immediately! I love fizz. Unfortunately, the fizzing stopped after about two seconds. Bummer. I also noticed that while the powder was dissolving, the color of the drink changed from palest orange to, again, a very Tang-like bright unnatural orange. The color seemed to be encapsulated in bigger particles in the otherwise super-fine powder, because they kept floating to the top and kind of popping / disbursing. It was all marginally interesting to watch (more interesting than the accounting I should have been doing, anyway).

Once the powder had dissolved, I gave the drink a sniff. It still smelled like weak Tang. Which...if you drank Tang as a child, you understand the utter depressing nature of weak-assed Tang. It's just...ugh. So much promise, and so little delivery.

Anyway - so finally I screwed up the tits to taste the drink. It tasted like an unholy mixture of heavily watered down orange Gatorade and citric acid (which, surprise, was the second ingredient on the list - and if you've never tasted straight citric acid, it tastes like the coating on Sour Patch Kids or other super-sour candies. It's like, punch-you-in-the-jaw sour), with a strong background chalkiness akin to Alka Selzter (so possibly the fizzing agent is to blame?). It was unpleasant, certainly...but not unbearable. I could envision knocking a cup of it back if I for some reason felt desperately deficient of vitamin C or B vitamins, or more likely if I was the type who really got a lot out of the placebo effect.


As an aside, there was far less fizziness to the drink than I was hoping there would be, which was a disappointment. Somehow, despite the lack of fizziness, the drink has been causing me to have intermittent Tang-scented burps for the last 20 minutes. Go figure.

So, there you go. Thus concludes my first "How Bad Can It Go" experiment. If there's anything you'd like to see me try out and rant about, feel free to leave a comment here or on the OneGirlCooks Facebook page. I will consider all suggestions (within reason. I am not eating poop. Or brains. Or bugs, OMG).

Sunday, September 7, 2014

pumpkin spice smoothie

It's that time of year again - PUMPKIN SPICE ALL THE THINGS!

I, for one, welcome our new pumpkin spice overlords not only because their arrival is a harbinger of my favorite season, but because pumpkin stuff is just plain GOOD. Plus, it can be good for you, too - pumpkin is packed with vitamin A, potassium and fiber, hooray!

There was a can of pumpkin on my shelf left over from something else I'd been making back before the weather got insane this summer, and it was right in my line of sight every morning as I was making my coffee and my normal berry-banana smoothie. Because I am incapable of actual full-blown coherent thoughts before coffee, my thought process always went something like, "Mmmm...pumpkin. Piiiiie. Pie good. Pie too cook, very hot, much sugar. Mmmm...pumpkin."

Eventually, the idea of doing something besides making a pie with the can of pumpkin trickled down into my brain meats and started showing up AFTER coffee, which is when things become actionable in my world. I had been turning the idea over in my head for a few days when, this morning, dun dun DUNNNNNN...I realized I was out of bananas for my normal smoothie. This could not stand, and I wasn't about to put pants on to go buy more bananas, so an alternative smoothie had to be created. Enter pumpkin, stage left.

I didn't take a picture of the smoothie for you looky-loos, but just imagine liquid pumpkin pie filling in a Barking Squirrel pint glass, and you're there.

This recipe makes a BIG smoothie (see: pint glass reference above), but I like big smoothies since that's usually the entirety of my breakfast. If you want less smoothie, half the recipe - or put half in the freezer, maybe?

Pumpkin Spice Smoothie

3/4 cup pumpkin puree
1 cup milk
1 scoop protein powder (mine is non-sugar sweetened. If you're using totally unsweetened powder, you might want to add a little maple syrup to the mix to sweeten it up)
spices to taste - I used a combination of ginger, clove, cinnamon and nutmeg.


Blend everything together in a blender or food processor, dump into a glass and enjoy!

Because of the dairy, this is obviously not strict Paleo- or Whole30-compliant. I personally have done dairy-exclusion periods in the past and found that I have no problems with digesting it when I reintroduce it, so I no longer exclude it from my diet. If you can't have / aren't eating dairy, you could easily use almond milk or coconut milk in this recipe instead. Coconut milk tends to run sweeter though, so you may want to start with about half a cup and taste to make sure you're not ending up with something really cloying. Unless cloying is your thing of course...then have at it.

Tuesday, September 2, 2014

lazy broccoli salad

I really like broccoli salad. You know, the kind with bacon and cranberries or raisins and nuts and bacon. Mmm, bacon.

What?

Oh, yeah. Salad.

So, broccoli salad is kind of a pain in the ass to make. There's a lot of chopping involved - more chopping than I want to do on most nights after work, frankly. I decided to try using a bag of shredded broccoli slaw instead, and it worked very well. Plus it took about a tenth as long to prepare.

Crunchy! 
The rest of the plate is pretty self-explanatory - leftover chicken thighs and sliced tomato. Ta-da! Quick, lazy Whole30 compliant dinner (if you use olive oil mayo and make sure your dried cranberries don't have any added sugar, anyway).


Monday, September 1, 2014

fancy fish bags

Hehehehe. Fish bags. It's fun to say, try it! Fish bags, fish bags, fish bags. I'm not high, I swear to you.

ANYWAY.

Whilst grocery shopping yesterday, I spied with my little green eye some parchment bags made for steaming shit in the oven. Well, not shit, but you know. I was immediately entranced with the pretty picture of perfectly cooked fish and veg on the box, and I had to have them. HAD TO. I am weak. It is known, khaleesi.

I've done "en papillote" fish preparations before and enjoyed them - all except the part where you have to fight with the parchment paper to stay crimped, while evil Alton Brown's voice keeps ringing in the back of your head, maniacally laughing and saying, "IT'S SOOOO SIMMMPLE!"  Maybe he's right - maybe it IS really simple and I just fucking fail at parchment origami, I don't know. What I DO know is that what's even easier than farting around with parchment for 20 fucking minutes while your stomach rumbles and you see stars from hunger? PRE-MADE PARCHMENT BAGS, bitches.

Mystery baaaag...are you ready for your mystery baaaag? It's not full of dog poop. OR IS IT? (it's probably not)

Told you.
You guys. I can't even. These bags? Are my new favorite thing. All I did was lay a couple pieces of cod over some asparagus, green beans and sliced red pepper, add a little poorly-cut basil on top, seal the bag with a couple folds over, and it was ready to roll. I did two bags (because the Ginger Beast needs to eat, too) on a cookie sheet, stashed them in a 350 degree oven for about 15 minutes, and lo, the fish, eet was done!

The asparagus is being a tease in this one.
Now...I will be completely honest with you here. First of all, I really like the taste of cod, so I don't usually fuck around with it much. You could easily gussy this up with all kinds of fancy herbs and citrus and whatever, but...I really like cod. Second of all, the next time I do this, I will NOT lay the fish directly on the veg unless I have significantly thinner pieces of fish. These were some big, manly cod pieces (see what I did there? Manly? Cod pieces? OMG, somebody stop me. No, really...), and the veg underneath didn't cook as much as it could have. We like our veg pretty al dente here at Chez OGC and that asparagus was borderline even for us. So, yes - next time, I'll spread the veg out around the fish for more even cook-en-ings...or maybe even just steam it separately...although honestly, that would take like half the fun out of the whole dinner-from-a-bag thing.

If you care, or even if you don't, this meal is Paleo and Whole-30 compliant, and as gluten-free as the day is long. Tra-la-la, healthy food.

pan-fried chicken thigh amazingness

Have you fully accepted the amazingness of chicken thighs into your life? If not, you should. Yes friends, I am here today to preach the gospel of chicken thighs. They are cheaper and more forgiving than your mom, and they taste better too.

Seriously, though. Chicken thighs are hardly ever more than $1.89 a pound at my local Hannaford. That's for the bone-in ones, mind you. The boneless ones are more pricey, and they also have the skin removed. In my opinion, there's no point in eating chicken if you can't have the crispy, delicious skin as well, so just buy the bone-in ones and be done with it. Unless you like sad chicken. You don't like sad chicken though, right? I didn't think so.

De-boning chicken thighs is actually really easy. I would have done a little picture tutorial for you, but I don't have a tripod for the camera and I don't want to get it all smegged up with chicken juice, so...yeah. Anyway - it's really easy. You just take a good sharp knife and zip down one side of the bone, then the other, pull the flesh away to the end and then give it a twist to remove. Tra-la-la, de-boned chicken thigh...with bonus skin! Well, not BONUS skin, because that would be weird..but you know. Sorry, I'm tired.

So, yes - what I did with these lovely chicken thighs after I de-boned them was as follows:

- pat dry with paper towel
- sprinkle with kosher salt
- put them in a hot pan SKIN SIDE DOWN for about ten minutes, then flipped and cooked on the other side until cooked through (took about another seven minutes for mine).

So simple. So delicious. Thank you madam, may I have another!

They look small because they're far away, but trust me, they were not.
 The majesty that is pan-fried chicken thighs was complemented on this plate by slices of the best damn tomato I've had in YEARS, which came from just down the road at Long Wind Farm, and a variation on this salad - I say variation because her recipe calls for snap peas but I used green beans, and it calls for lemon juice but I used white wine vinegar. And I didn't measure anything. So it probably tasted totally different, but whatever, it was delicious and I never would have thought to put that combination of things together had I not read her recipe first.

"But the bones," you say..."what about the bones you took out of the chicken thighs?" You may not actually be saying that but I'm putting words in your mouth so that I can make a point. You could chuck the bones if you wanted. You could throw them out for the wild animals. You could string them onto a necklace and wear them as a fashion statement, but they'd probably get kind of rank after a couple days. What I do is put the bones in a freezer bag, scrawl the date on it, seal it up and stash it in the freezer. Later on, when it's not 2073 degrees outside and I feel like making soup, I use the bones to make stock. It's just a suggestion.

Also, for anyone playing along at home, this meal is Paleo compliant, Whole-30 compliant, gluten-free, and all kinds of tasty.

Sunday, August 31, 2014

a post about brain-meat. Not the eating there-of, don't worry.

Have you ever wondered why I seem to post for a few months pretty regularly, then disappear for months, then kind of pop back in here and start posting again? No? Well, tough tits - I'm about to explain it anyway.

I suffer from an anxiety disorder and depression. I've struggled with them for as long as I can remember, but "officially", as in, known by my doctor, since about 2004. I have been on medications, off medications, I've done therapy, I've read self-help books, I've tried vitamins, meditation, exercise...you name it, I've probably dabbled in it at some point in the hopes that it would help. And honestly, all that stuff HAS helped a little, on and off...but the one thing I've learned above all others in this process so far has been that there are no magic cure-alls, at least not for me. That sounds like such a fatalistic statement, but really it's the opposite, honestly. It's not that I don't believe there's anything out there that will help me, it's that I know myself and my condition well enough now to understand that it's never going to go away. It's like my green eyes or my brown hair. Try as I might to disguise them, they are a part of me and there's no real way to permanently change them.

My depression is cyclical. I'm not bi-polar - I don't have phases of extreme high and low. What I have are periods of feeling basically ok interspersed with periods where I have a really hard time dealing with just about everything. During those "down-swings", I tend to also get very anxious and I also have a hard time doing all the tiny normal things that healthy people do every day: stuff like cleaning my teeth and brushing my hair, for example. It's not that those things start to feel optional to me when I'm depressed, it's that they just kind of get removed from my automatic to-do list. Bigger things, like washing the dishes or doing the laundry, go from being odious little tasks that take up a little of my knitting time to gigantic tasks that I literally need to plan ahead and prepare myself for hours ahead of time..and then I'm mentally exhausted afterward. Even cooking or knitting, things I truly love to do, turn into tasks that take monumental force of personal will to accomplish, and so I pretty much just stop doing them when I'm depressed.

Depression is also a teller of lies. It convinces me that even if I COULD muster up the energy and enthusiasm to cook a really good meal, nobody wants to fucking see it or hear about it. Hell, half the time it tells me that the food isn't even good, that I've just deluded myself into thinking it is because I want it to be. All of my friends' and family's assurances to the contrary don't amount to a piss-hole in the snow (there's a classic Vermont-ism for you, by jeezum) when compared to depression's overwhelming declaration that I am, in fact, not good at anything at all, ever, to infinity and beyond. Depression weighs in with these lies about everything, not just about whether or not I should bother to blog a particularly nice roast or salad. It tells me I am stupid, that I am ugly, that I am a failure, that I am worthless and unworthy of love. Through my normal, every-day lenses, I can see that those statements all amount to a steaming hot pile of bullshit...but through the fogged-up, iced-over lenses of my depression glasses, everything looks a whole lot different and it becomes very difficult to know what to believe anymore.

My down-swings can last anywhere from a couple days to a few months. Sometimes they come on gradually, insidiously changing my brain in little ways here and there until weeks later I realize what's going on. Other times they hit me like a freight train and leave me sitting in the dark sobbing over a bag of clean laundry while my husband tries to comfort me without knowing what the hell is going on, and with me unable to articulate (thanks, baby. And sorry if I scared you). I also spend a lot of time in the kind of in-between limbo of not-full-on-depressed-but-not-really-ok. I can function pretty convincingly at this level - it's where I am today, in fact - but I still have kind of a hard time with some things, and one of those things is writing. So even if I'm over here making amazing food and taking decent pictures of it, I'm still having a hard time actually getting down into words anything about it other than, "I are am roast pork thing. Potato r gud. Blueberry pie forevar".

So that, dear readers, is why I am sometimes gone for months at a time...because sometimes I just literally do not have the spoons to even cook for myself and my husband, let alone make it pretty and then write about it. You don't have to pretend to understand or even care, I mostly just had to get this out of my brain today for me. Like I said in the beginning, I've finally accepted that there are no quick fixes for my brain-meats. Learning how to deal with this fuckery is part of my life's work, and as we all know, work isn't generally meant to be fun...otherwise it would be called fun and everyone would do it.

If you made it this far, then by god you deserve a cookie. Gluten-free, of course. ;)


Tuesday, April 1, 2014

beef short ribs

Beef short ribs are something I've always wanted to try cooking but either couldn't find them, couldn't AFFORD them, or was intimidated by them. The stars aligned today, though - short ribs were in stock, they were on sale, and I wasn't afraid to throw them in the crock pot and see what happened!

What happened was this, and it was so, SO good:

mmm, beef!

The fact that I was ever intimidated by short ribs is really kind of laughable, given how dead easy these were to make and how well they turned out. I guess I was thinking they'd be sinewy and tough, but they turned out fall-apart tender and full of amazing beefy goodness.


I started by seasoning the ribs with salt and pepper and searing them off in a hot pan. The ribs then went into the crock pot with a large onion, a couple carrots, a couple stalks of celery, and five or six cloves of garlic, all chopped roughly. I added a bay leaf, a little allspice (like half a teaspoon), and about a quarter cup of dried porcini mushrooms that I crumbled. I deglazed the searing pan with some beef stock, then dumped that into the crock pot along with a couple more cups of beef stock. I probably ended up using about 3 cups of stock plus a cup or so of water. It all cooked on low for about six hours, then sat on "warm" until I got home a couple hours after that.


When I got home, I steamed some green beans, fished the ribs out, and took a stick blender to the liquid and softened veg left in the crock to make a velvety sauce to spoon over the ribs. Super quick, really easy, and OMG YUMMY.


Also, a side-note - you may notice the bottles of Shed Mountain Ale in the background. If you're somewhere where it's available and you like brown ale, you should definitely try it. It went with my short ribs wonderfully and I can definitely see it being a compliment to any kind of roasted or grilled beef or pork. It's kind of heavy-duty with an ABV of 7.4%, but it doesn't taste "boozy" like some higher-alcohol beers tend to. I don't usually write about beer here, but I enjoyed the Mountain Ale enough that I'm giving it a shout out...so that should tell you something.