Tuesday, March 17, 2015

carnitas

Carnitas are, essentially, chunks of braised pork butt. As the braising liquid slowly evaporates from the pot, the fat renders out of the pork and collects in the bottom of the pot (because fat is more dense than water. SCIENCE!). Eventually the water all cooks out and you're left with succulent spiced pieces of pork that crisp up in their own fat. It takes several hours and is all very torturous in that it fills the house with amazing pork aromas long before the meat is actually ready - but I assure you, it's totally worth doing.

It looks totally unappetizing at the beginning. I posted this picture on Facebook and had people guessing it was everything from bean soup to vomit (I'm not sure about that person, honestly...but we won't go there):

Not winning any beauty contests.

The end product is much more attractive, though - well, if you're into crispy pork bits, anyway...and if you're not, you've probably come to the wrong place:

Mmm, looking better!
The carnitas are very tasty just like that, honestly. I like them with eggs for a hearty weekend breakfast, or you could easily toss some into sauteed greens for a bit of flavoring. They are excellent on top of a baked sweet potato as well.

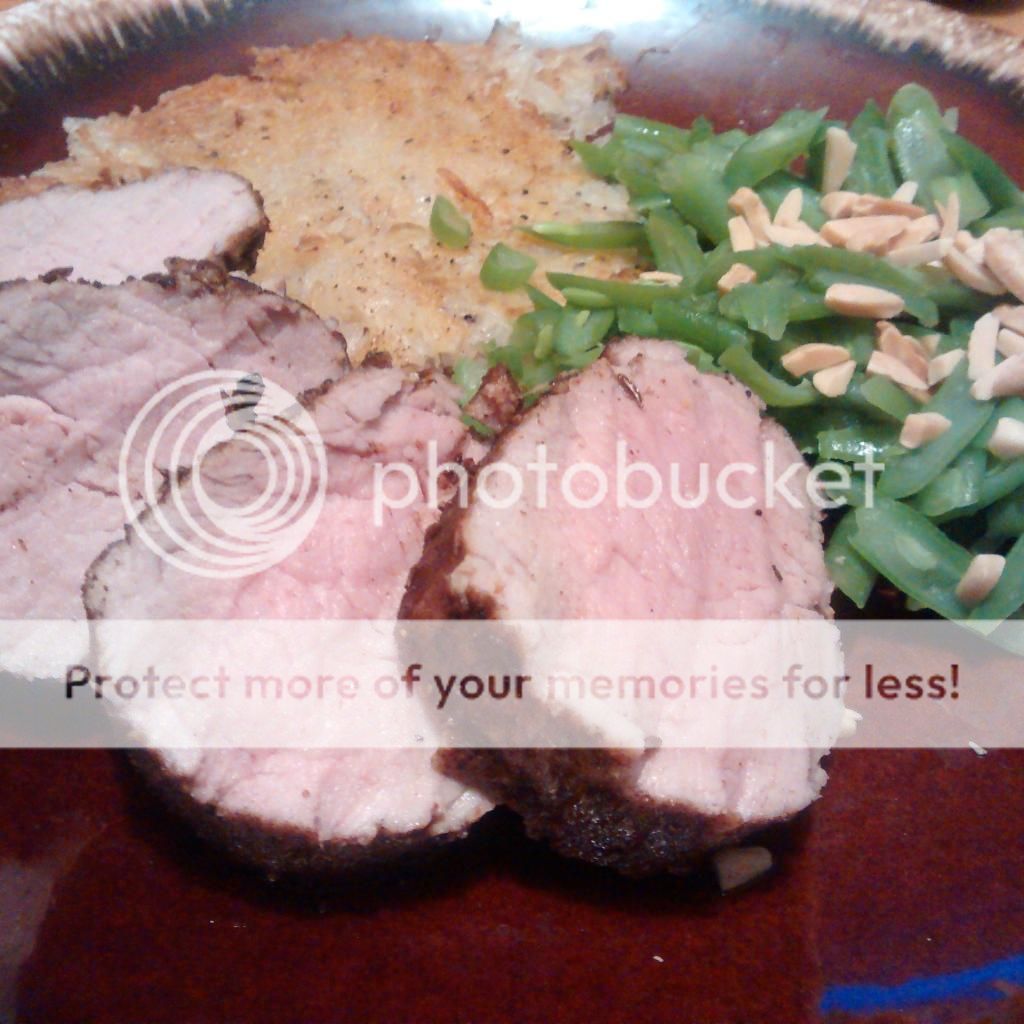
Or, you could use them in the more traditional way. No, not rubbing them all over your naked body while you groan happily (wow, that got weird) - rather, piling them on tortillas with lots of fixings:

Winner winner, carnitas for dinner.
My favorite combination of toppings for carnitas is raw shredded cabbage and radish, because they offer a nice crunchy fresh counterpoint to the rich pork. A little bit of avocado on top makes it even more pretty and acts as a built-in dressing. I don't usually go for salsa on carnitas because they already have a lot of acid in them, but don't let that stop you if you want to try it.

Also, a note about tortillas - I use corn tortillas, and I warm them up one at a time in a ripping-hot pan so that they blister a little and get a bit black in places. You could just warm the tortillas up in the oven or microwave, but I really like the smokey note that the toasted bits of tortilla add.

Here's the recipe for the carnitas themselves:

3lbs pork butt, cut into large-ish pieces - mine are like 3" square-ish chunks, usually
1/2 cup orange juice
1/4 cup lime juice
 crushed garlic cloves to taste - I usually use 4 or 5 good sized ones
1 tsp ground cumin
1/2 tsp ground coriander
1.5 tsp salt (I use kosher salt - if you're using regular salt, adjust the amount down by 1/4 tsp or so)

Put everything in a big pot, bring it to a boil, then turn down the heat and let it simmer, uncovered, for about 2 - 2.5 hours. No stirring, no poking, no nothing. Leave it alone! After a couple hours, you can turn the heat up a little and let it cook more briskly for another 45 minutes or so. Again, don't mess with the meat at all. The water will cook out completely and the pork will start to sizzle in its own fat - this is when you want to really pay close attention. When you notice the edges starting to get crisp / brown, you can carefully start turning the pieces of pork over to crisp up on the other sides. It will be very loose and want to fall apart at this point - that's ok, just be gentle with it and don't worry if it comes apart some. As the pieces get browned and crisped to your liking, remove them to a bowl for serving. I like to aggressively scrape the bottom of the pot with a wooden spoon once all the main chunks of meat are out of it in order to make sure I'm getting up all the really crisp bits off the bottom, as well. Those are, in my opinion, the best bits!

Serve on warm tortillas with preferred toppings, or throw into any number of other dishes for happy-making porky goodness. This also freezes very well.

This recipe is gluten-free, and assuming you skip the corn tortillas, would be Paleo- and Primal-compliant.


Saturday, March 14, 2015

pork all the things - a stir-fry odyssey

This past week, boneless pork loin was on sale at the grocery store, so I bought a huge one and we've been having pork for dinner every night this week. I did pan-fried chops one night, I did a roast another night, we had the leftovers from the roast with some braised cabbage the following night, and last night I used the last of the loin to make stir-fry:


I like stir-fry, because not only is it a good way to get in plenty of vegetables and protein, but it's also a pretty high culinary pay-out for a small amount of effort. Also, anything that I can cook with the burner cranked up to high is automatically exciting in my book.

Pork loin is nice in a stir-fry because it's got a little extra fat as compared to tenderloin, so it offers more porky flavor and stays a bit more moist. I like to give mine a bath in a combination of tamari, sesame oil, honey, grated fresh ginger and a splash of water:


The meat sits in the marinade while I chop up my veggies. This is my go-to combination of broccoli, red bell pepper, onion and mushroom:


When the veg is all chopped, it's time to fry! I crank the heat up under my favorite heavy-bottomed saute pan and after a minute or so, I add some coconut oil. Once the coconut oil is melted, I throw my veg in, starting with the ones that take the most time to cook. In this case, broccoli goes in for about a minute, then I dump everything else in because the onions, peppers and mushrooms all basically cook at the same speed. I swear by tongs for stir-frying - I have a pair with silicone tips on the ends so that they don't scrape my pan up, and they're great.

The veg comes out when it's crisp-tender:


...and in goes the meat, working in batches so as not to over-crowd it and end up with steamed chewy pork bits of sadness:


The remainder of the marinade goes into the pan with the last of the pork and I let it cook down to a glaze consistency, then add all the pork back in and toss it to coat. It gets quite dark because the sugars in the honey caramelize with the soy, but that's exactly what makes it taste awesome. Don't fear the caramelization!

When the meat is cooked through, toss it on top of your dished-up veg and voila, Paleo-friendly stir-fry, no rice needed!

Friday, March 6, 2015

glazing my thighs

No, I will never tire of post-title innuendo (in YOUR end-o!). Not even sorry.

Anywho.

I've been kind of obsessed with the half-stove-top, half-oven method of cooking chicken thighs lately. It's an easy and reliable way of getting super crisp skin on the thighs without having to coat them in something like panko or cornmeal. I'll admit, it's kind of messy if you don't have a splatter shield, but even so, it's totally worth an extra wipe-down of the stove-top, in my opinion.

When I was making up my menu last weekend and saw chicken thighs on sale again, I thought to myself, "Self...why couldn't we use the stove-top-then-oven method to make some super crisp chicken thighs, then stir up a little batch of the glaze we use on chicken wings and dump it over the thighs instead? Doesn't that seem like a good idea?" It DID seem like a good idea, so I rolled with it, and this is what I ended up with:

So crispy. Much nom.


For the glaze, I used a mixture of fresh grated garlic and ginger, some tamari, some honey, toasted sesame oil, and a splash of water. I always add the water thinking that the glaze needs to be thinned out, and I always regret having added the water when I go to taste the glaze and it tastes...watered down. Welcome to my life. In retrospect, I could have reduced the glaze down in a pan to cook some of the water back out, but that sounds like a lot of work.

I started the chicken thighs out in a hot pan with a little coconut oil in it (skin-side down, duh), and let them fizzle and splatter happily for about 8 minutes until the skin was good and crispy and brown. Then I flipped the thighs over in the pan, turned off the heat, and spooned my glaze mixture over the meat. The pan then went directly into a 425 degree oven (use an oven-proof pan, friends...I will not be held responsible for you melting the handles off your pans) for about 15 minutes until the thighs read 165-170 degrees, at which point they were done. Huzzah!

The veggies were very simple: I cut up carrots, onion, radishes (I had some hanging around I wanted to use up), and two broccoli crowns, and quickly stir-fried them in a very hot pan with a little coconut oil. The broccoli was being slightly uncooperative and didn't want to cook through as fast as everything else did, so I threw a lid on the pan and let it steam for a few minutes to finish it off.

This dish is gluten-free (as long as you use tamari rather than soy sauce), and if you wanted to be super-strict Paleo you could sub the tamari for coconut aminos and get extra, uhh...dinosaur points.

Get it? Paleo? Dinosaur? Nevermind...


Monday, March 2, 2015

spice-crusted pork tenderloin

You all know of my deep and abiding love of all things pork, but I have been keeping a dirty little secret from you: I am not a fan of pork tenderloin. I love the texture of it, but similar to beef tenderloin, it has very little flavor in and of itself, and to a card-carrying meat lover, that's kind of sad-making. That, along with the fact that tenderloin is super lean and easy to over-cook have led me to just basically avoid buying it for many years.

Until this past weekend.

Sexy meat.
I found a recipe for spice-crusted pork tenderloin in a Cooks Illustrated collection of "skillet dinners". They showed medallions of rosy moist pork heavily crusted with spice and served with a sexy golden-brown potato roesti (which, for the unintiated, is basically a giant pan-fried hash brown and is one of the best things you can make with potatoes. Which is saying a lot, in my book, because I love me some potatoes). I was sold. I needed to try it. I tried to talk myself out of it, but it just wasn't working. The hook was firmly set and I surrendered to the pull.

The recipe calls for rolling the tenderloins in a mixture of spices (caraway seeds, ground coriander, nutmeg, allspice, salt and black pepper), then searing the meat off on all sides in a hot pan with a bit of melted butter. The meat then goes in a baking dish in a 425 degree oven for 12-15 minutes until it hits 140 degrees. You take the meat out at that point, tent it with foil, and let it rest until it hits 150. I ended up having to leave mine in the oven for about 22 minutes to get it to 140 degrees, but that was entirely my own fault because I didn't pull the meat out of the fridge until like 20 minutes before I wanted to cook, which is a rookie move.

Even with the added cooking time, the meat stayed super juicy and tender, though. And when I say tender, I mean like...you could cut it with the side of your fork. No knives necessary. Redonkulous. I think next time I make this, I'm going to pre-rub the meat (hurrrr) with the spice mixture and let it sit for a while before I cook it, just to see if the flavors sink in more. I suppose you could brine the tenderloin ahead of time if you were feeling really fucking ambitious about it, but a) I'm never that ambitious and b) I'd be a little worried that brining might turn the meat mushy rather than impart more flavor. I don't know. If you try it, tell me what you think.

The roesti was a little more work - I opted to shred my potatoes by hand rather than using my small and finicky food processor, so I got a good triceps workout holding the box grater at a weird angle in the bowl. You then have to rinse the excess starch off the shredded potato, then scoop it into a clean dish towel and wring as much water as you can out of it. You season the potato with salt and pepper, add a little corn starch to help bind the potato together better (there was a reason for this given in the write-up about the recipe but I was skimming so...yeah. No science today, sorry!), then plunk it all into a hot pan with some melted butter and keep squishing it down until it's a nice compact disc. It gets all GBD (golden brown delicious) on one side, then you flip it (which is a delicate operation, I tell you what), and let it get GBD on the other side. BOOM. Giant hash brown heaven. I will say, with regard to the roesti, that I should have had my heat turned up higher when I started, so it ended up kind of greasy. EVEN SO. Giant hash brown. So crunchy, much nom.


I steamed up some green beans with almonds to complete the plate. In retrospect, I could have made them more fancy with like some orange zest and cranberries, but...eh. I'm the weirdo who likes green beans even raw, so they don't need much fancying up for me to shove them in my nom-hole.

God, nom-hole sounds dirty. I'm keeping it. I love it. Heeeeee.

Anyway - this dinner is gloriously gluten-free (assuming you're doing your own due diligence on your spices). If you're going the Paleo or Primal route, you'd want to omit the corn starch and white potatoes, depending on how strict you're being.